Replacing liquid metal in an Asus Zephyrus G15
I’ve been using the Asus ROG Zephyrus G15 as my daily driver for a few years now. Laptops (gaming laptops especially) pack a lot of heat-generating components in a small and thin space, where the only airflow comes from the small blower fans in the system. In the case of the Zephyrus G15, there’s approximately 120 Watts of output, with 80W-100W going to the GPU and the rest going to the CPU. The cooling systems built into these things are pretty impressive considering the severe lack of thermal mass compared to desktop systems (Noctua’s NH-D15 cooler weighs half of the Zephyrus G15 at 980g without its fan, and that’s just a CPU cooler - the laptop has to cool the GPU as well with that weight, there’s the chassis, battery etc.).
A key part of this cooling system is the thermal interface material (TIM), which is added between the heat-generating components and the heatsink to plug in any gaps or scratches between the two surfaces and maximise thermal transfer. In desktops and most laptops it’s usually some flavour of non-conductive thermal paste, but there’s been a push in the last few years to use liquid metal paste in some high-performance laptops.
 (GPU die covered in liquid metal, Phiarc, CC BY-SA 4.0, via Wikimedia Commons)
Liquid metal is many times more thermally conductive than regular thermal paste, which is great for performance. The problem is that it’s also electrically conductive, and it’s a liquid - neither of which are things you want inside a laptop. Liquid metal doesn’t really set, and laptops move around a lot - they’re carried in bags, used on non-flat surfaces etc., all things that can make the TIM move around and on to things you really don’t want it touching. Asus has a pretty interesting writeup showing how they tried to mitigate some of those issues, mostly those related to application of the liquid metal. They’ve also added a silicone seal and a foam barrier around the CPU to try and prevent spillovers, which as we’ll see below actually saved my laptop.
Despite these precautions, I noticed that my CPU had thermal throttling on some cores but not others, and generally temperatures had climbed over my years of ownership of the laptop. I clean out the dust from the fans and heatsinks every few months (which you really should do, if you have a laptop), and the GPU wasn’t affected, so I suspected the liquid metal had shifted from its factory application. I didn’t want to deal with the fuss of reapplying liquid metal and having to redo this in 1-2 years again, so I went for Honeywell’s PTM7950 phase-change TIM as the replacement.
To do this, you’ll need plenty of lint-free paper towels, q-tips, isopropyl alcohol, an appropriate screwdriver set, and lots of patience.
PTM7950 is a phase-change material, which means it’s solid around room temperature but liquifies at the laptop’s operating temperature. The colder it is, the easier it is to handle, so it’s best to leave the PTM7950 in the freezer for 5-10m before applying it.
Some pictures of the process:
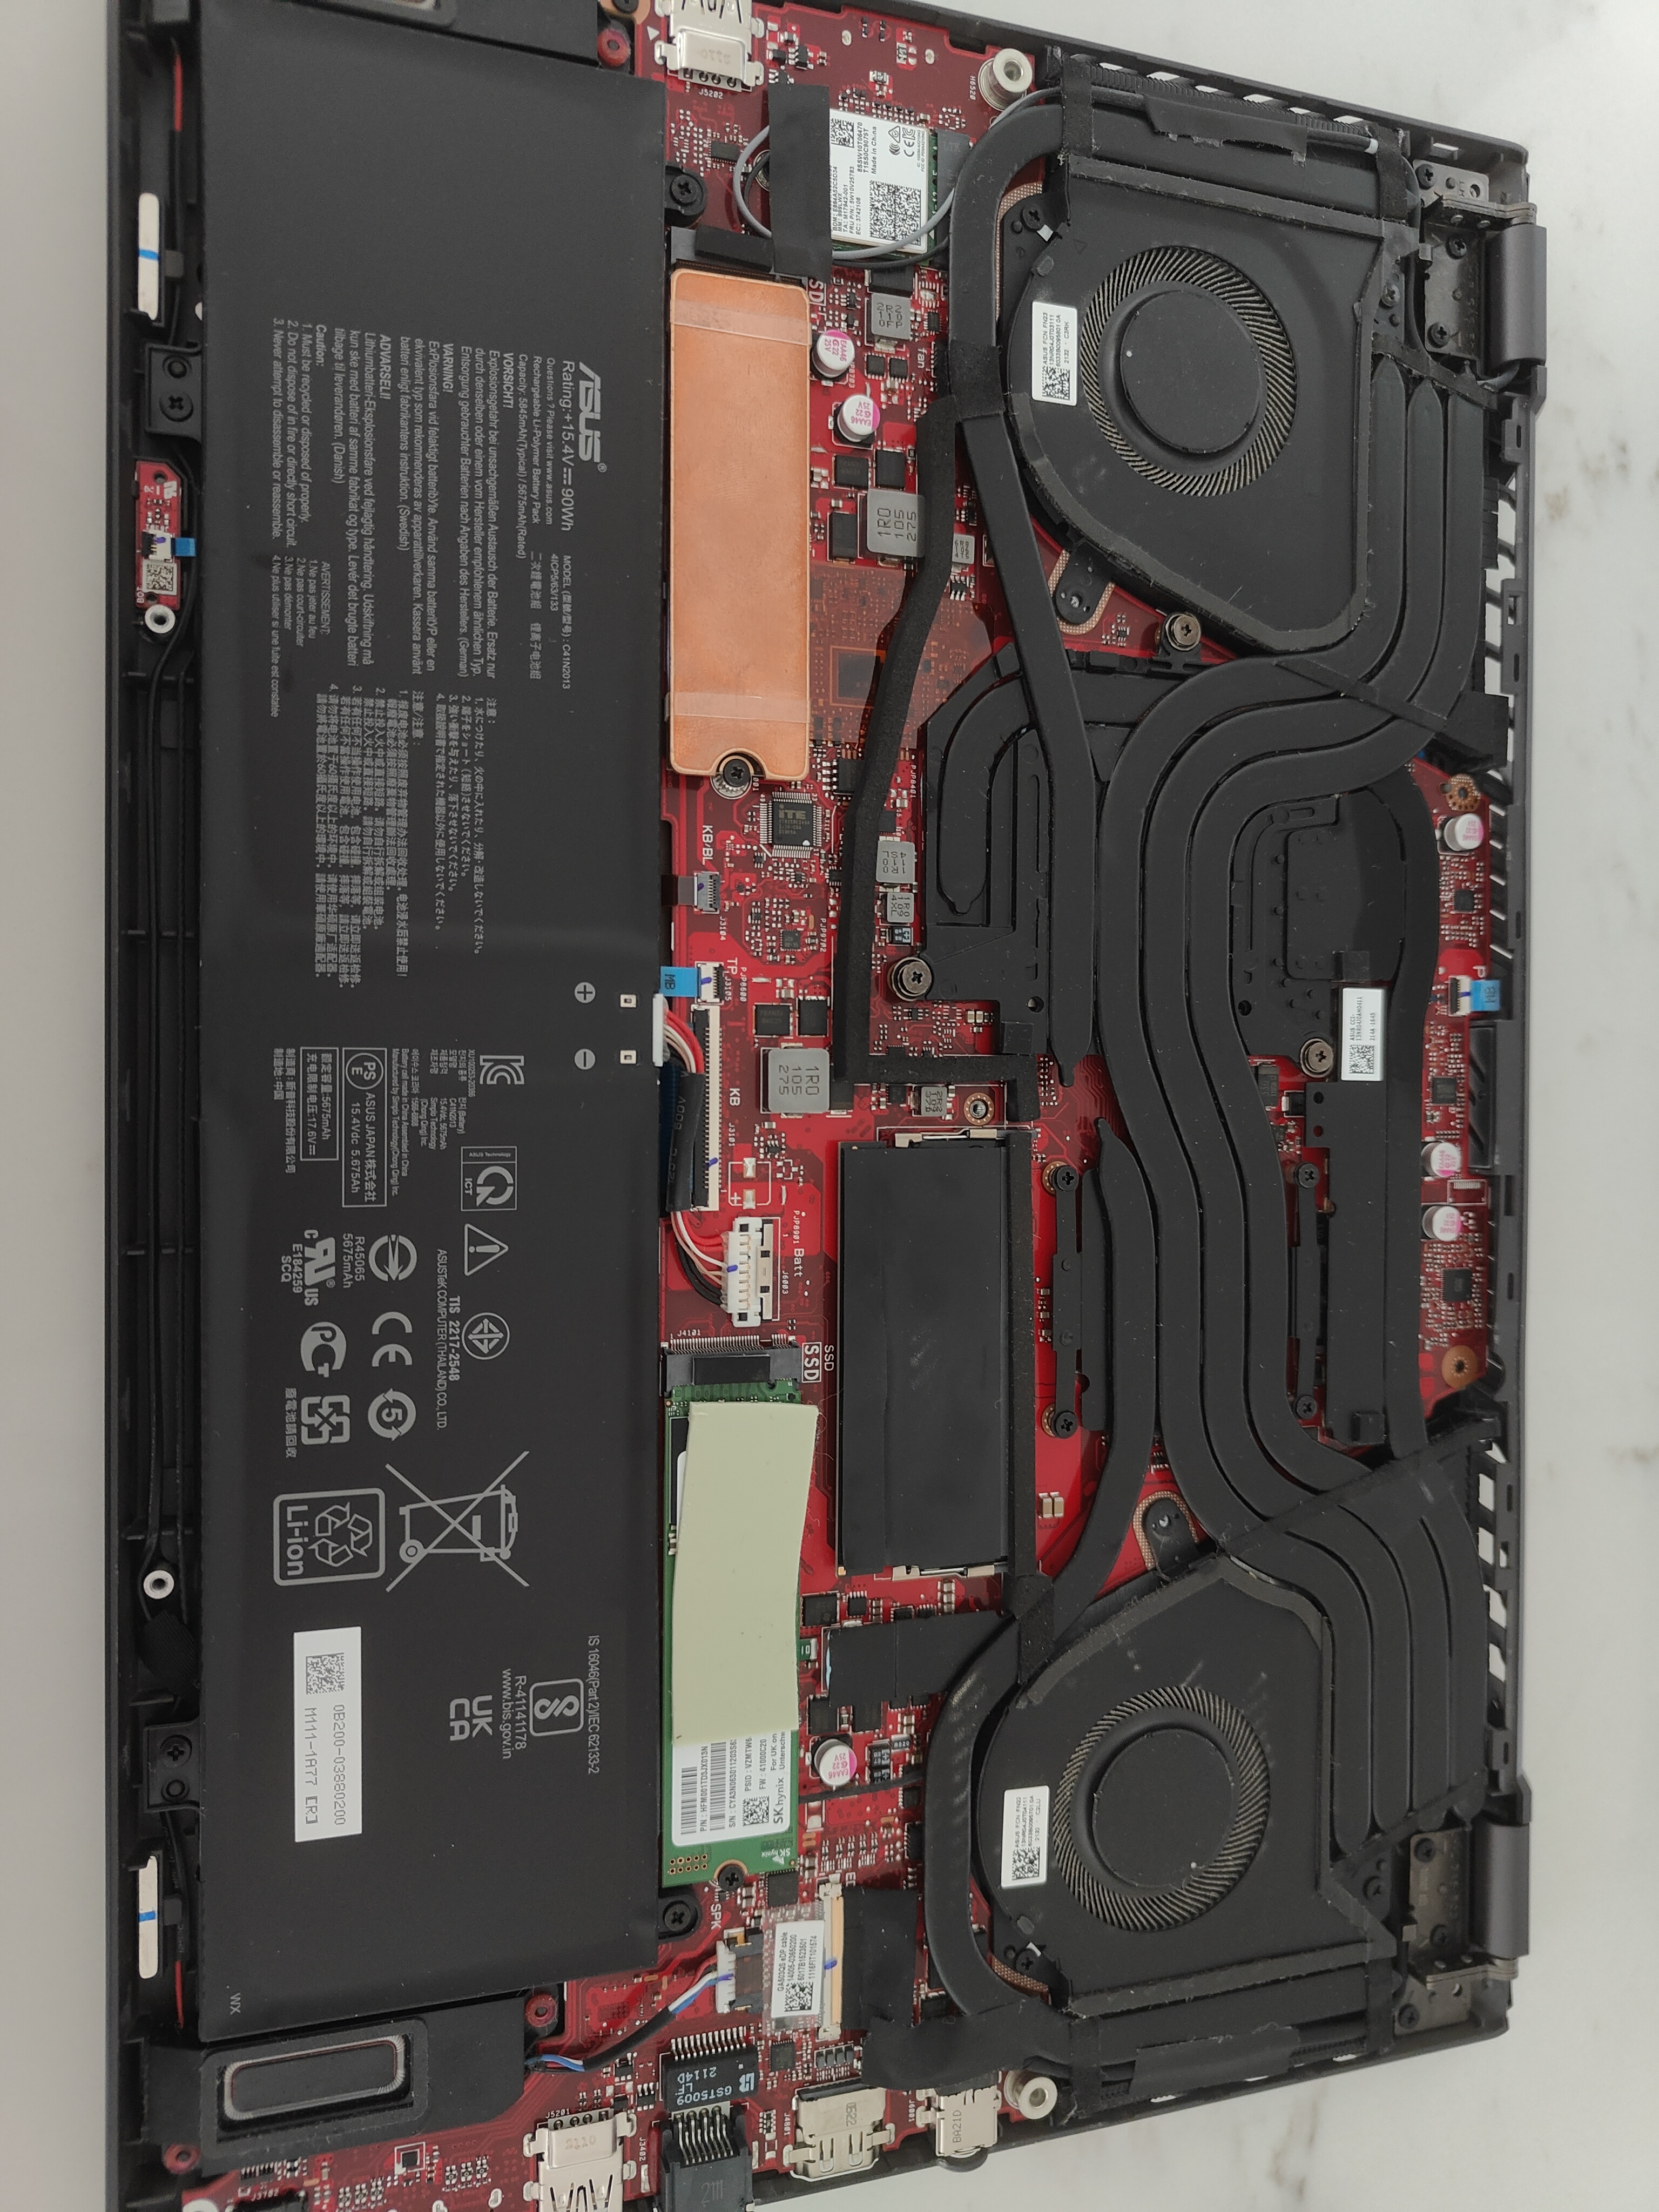
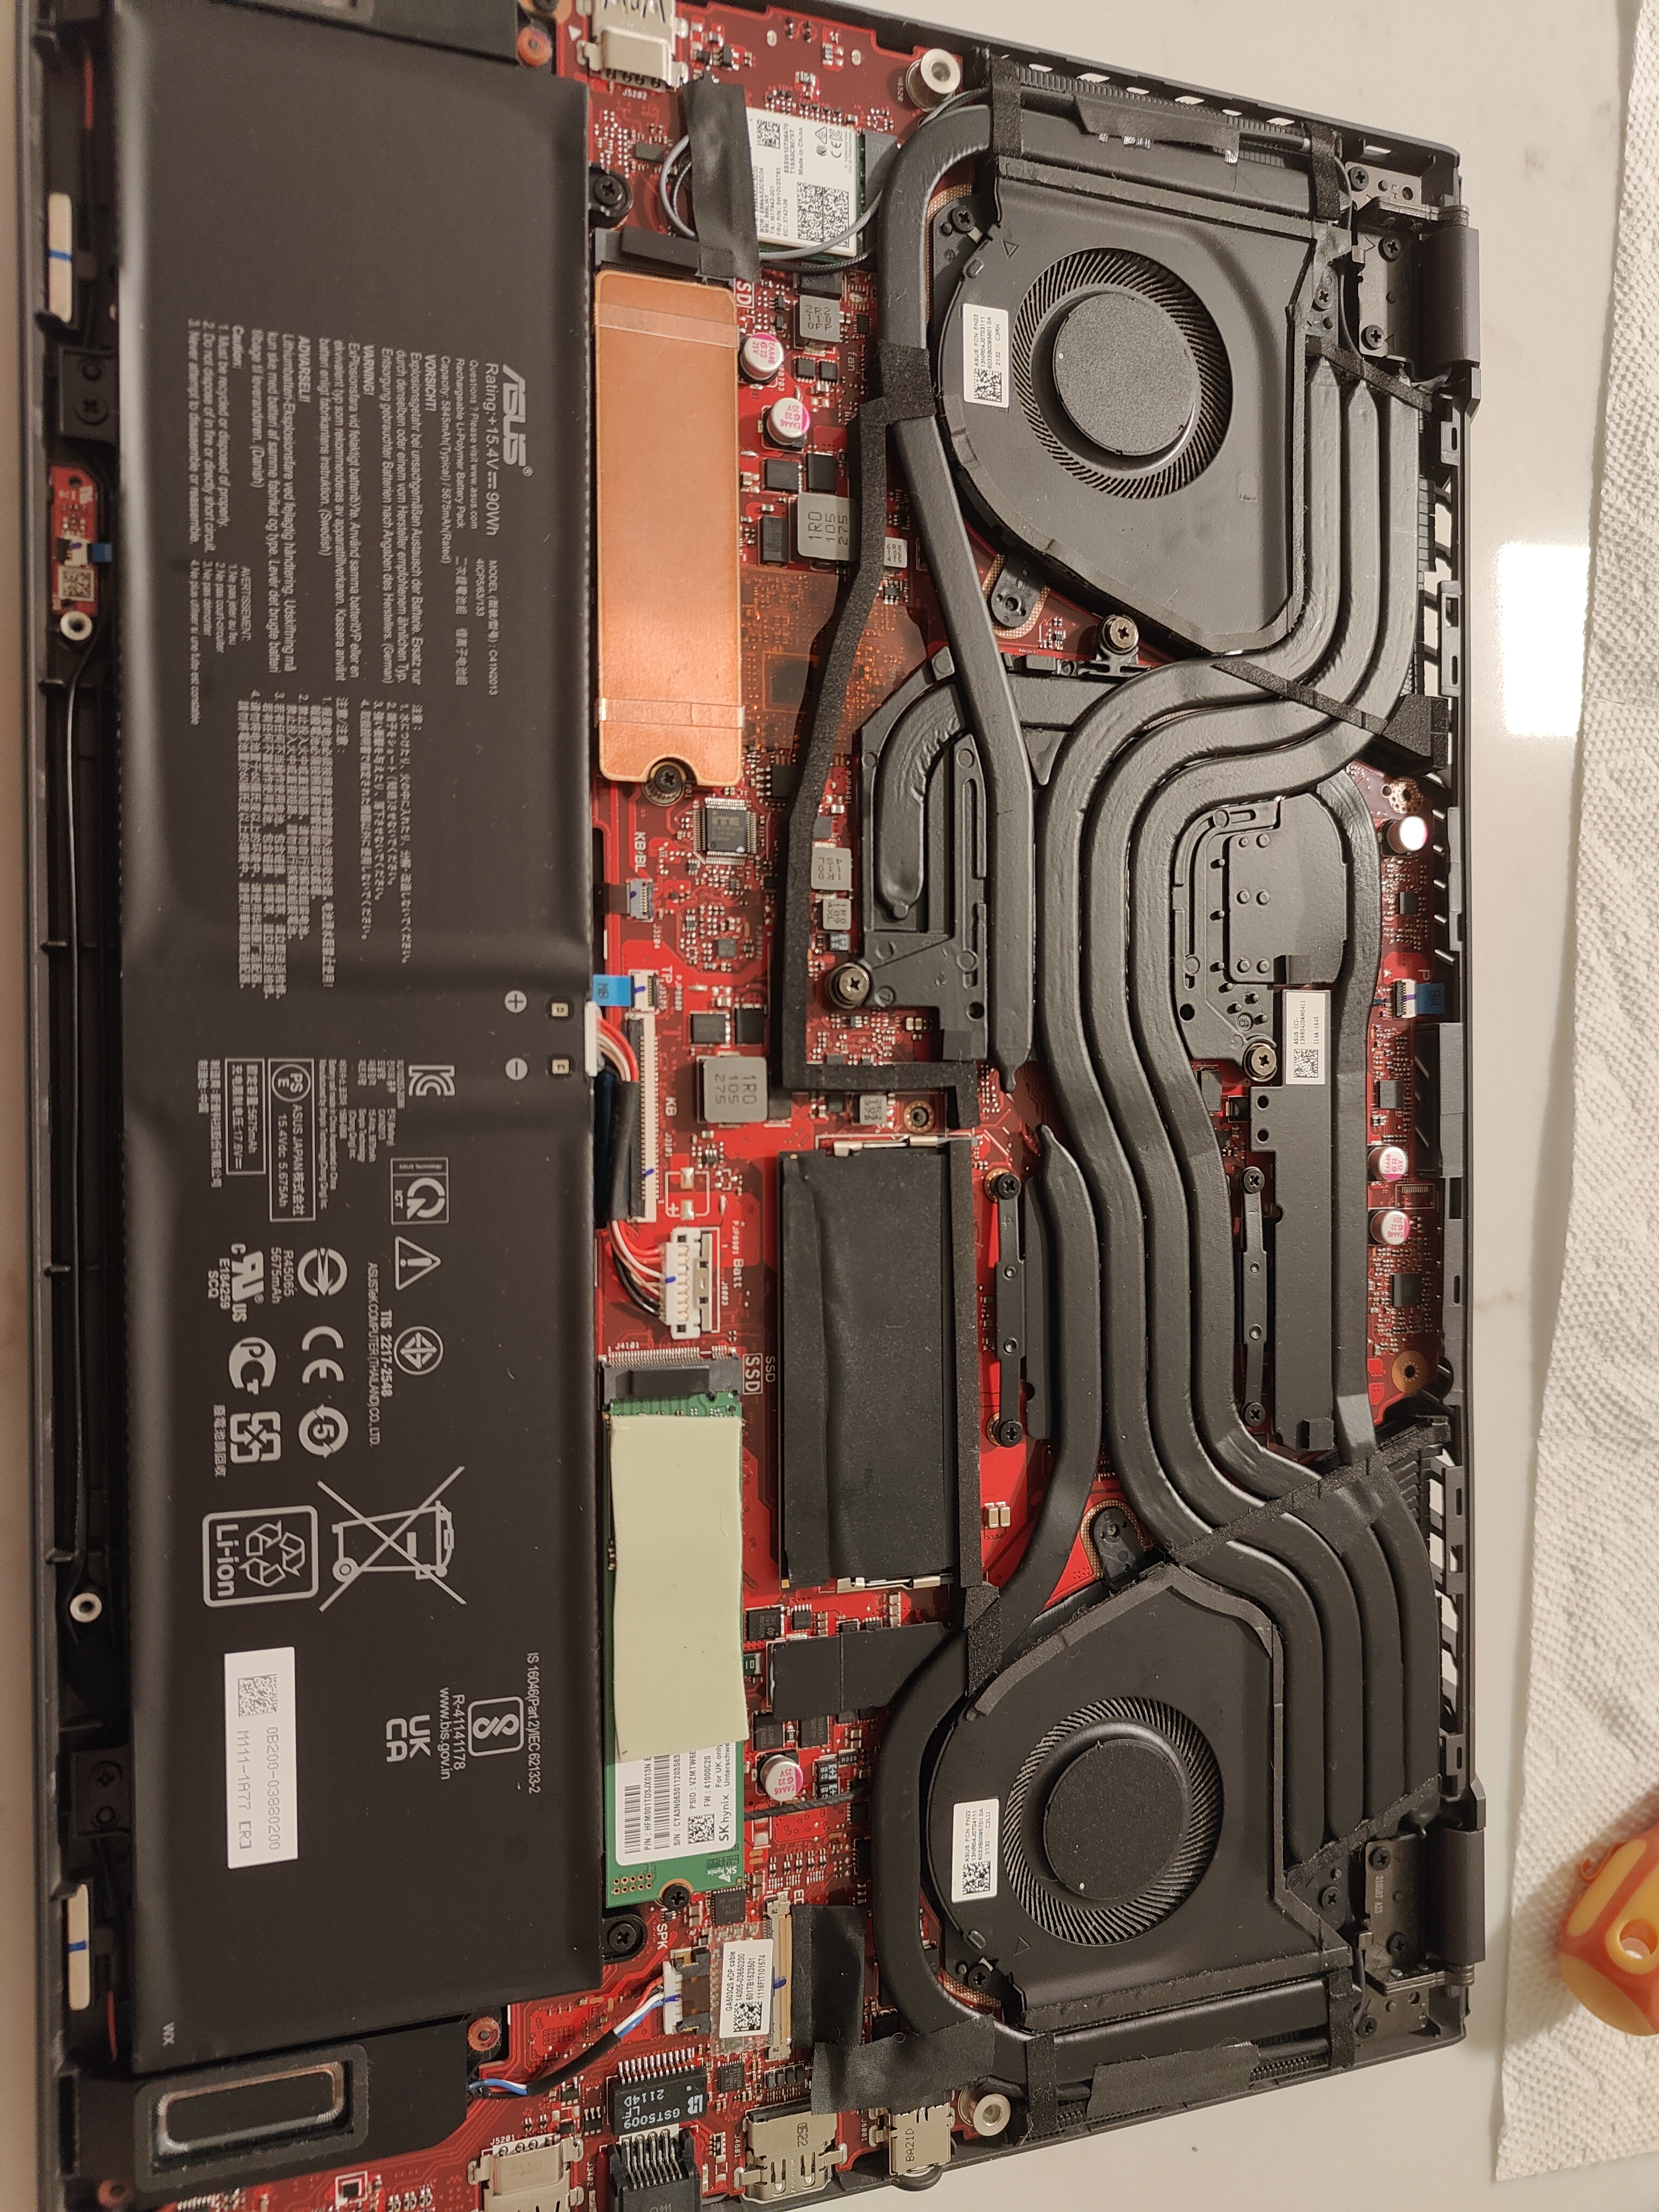
Removing the back cover of the laptop reveals everything we need - thankfully, the Zephyrus G15 doesn’t have the CPU and GPU on the back side of the motherboard. Make sure to disconnect the battery before doing anything else - components can be shorted even if the laptop is off. Make sure also to keep track of where the back cover screws go - they’re not all the same size. The two NVMe SSDs and single SODIMM RAM slot are visible here, but we don’t need to worry about them.
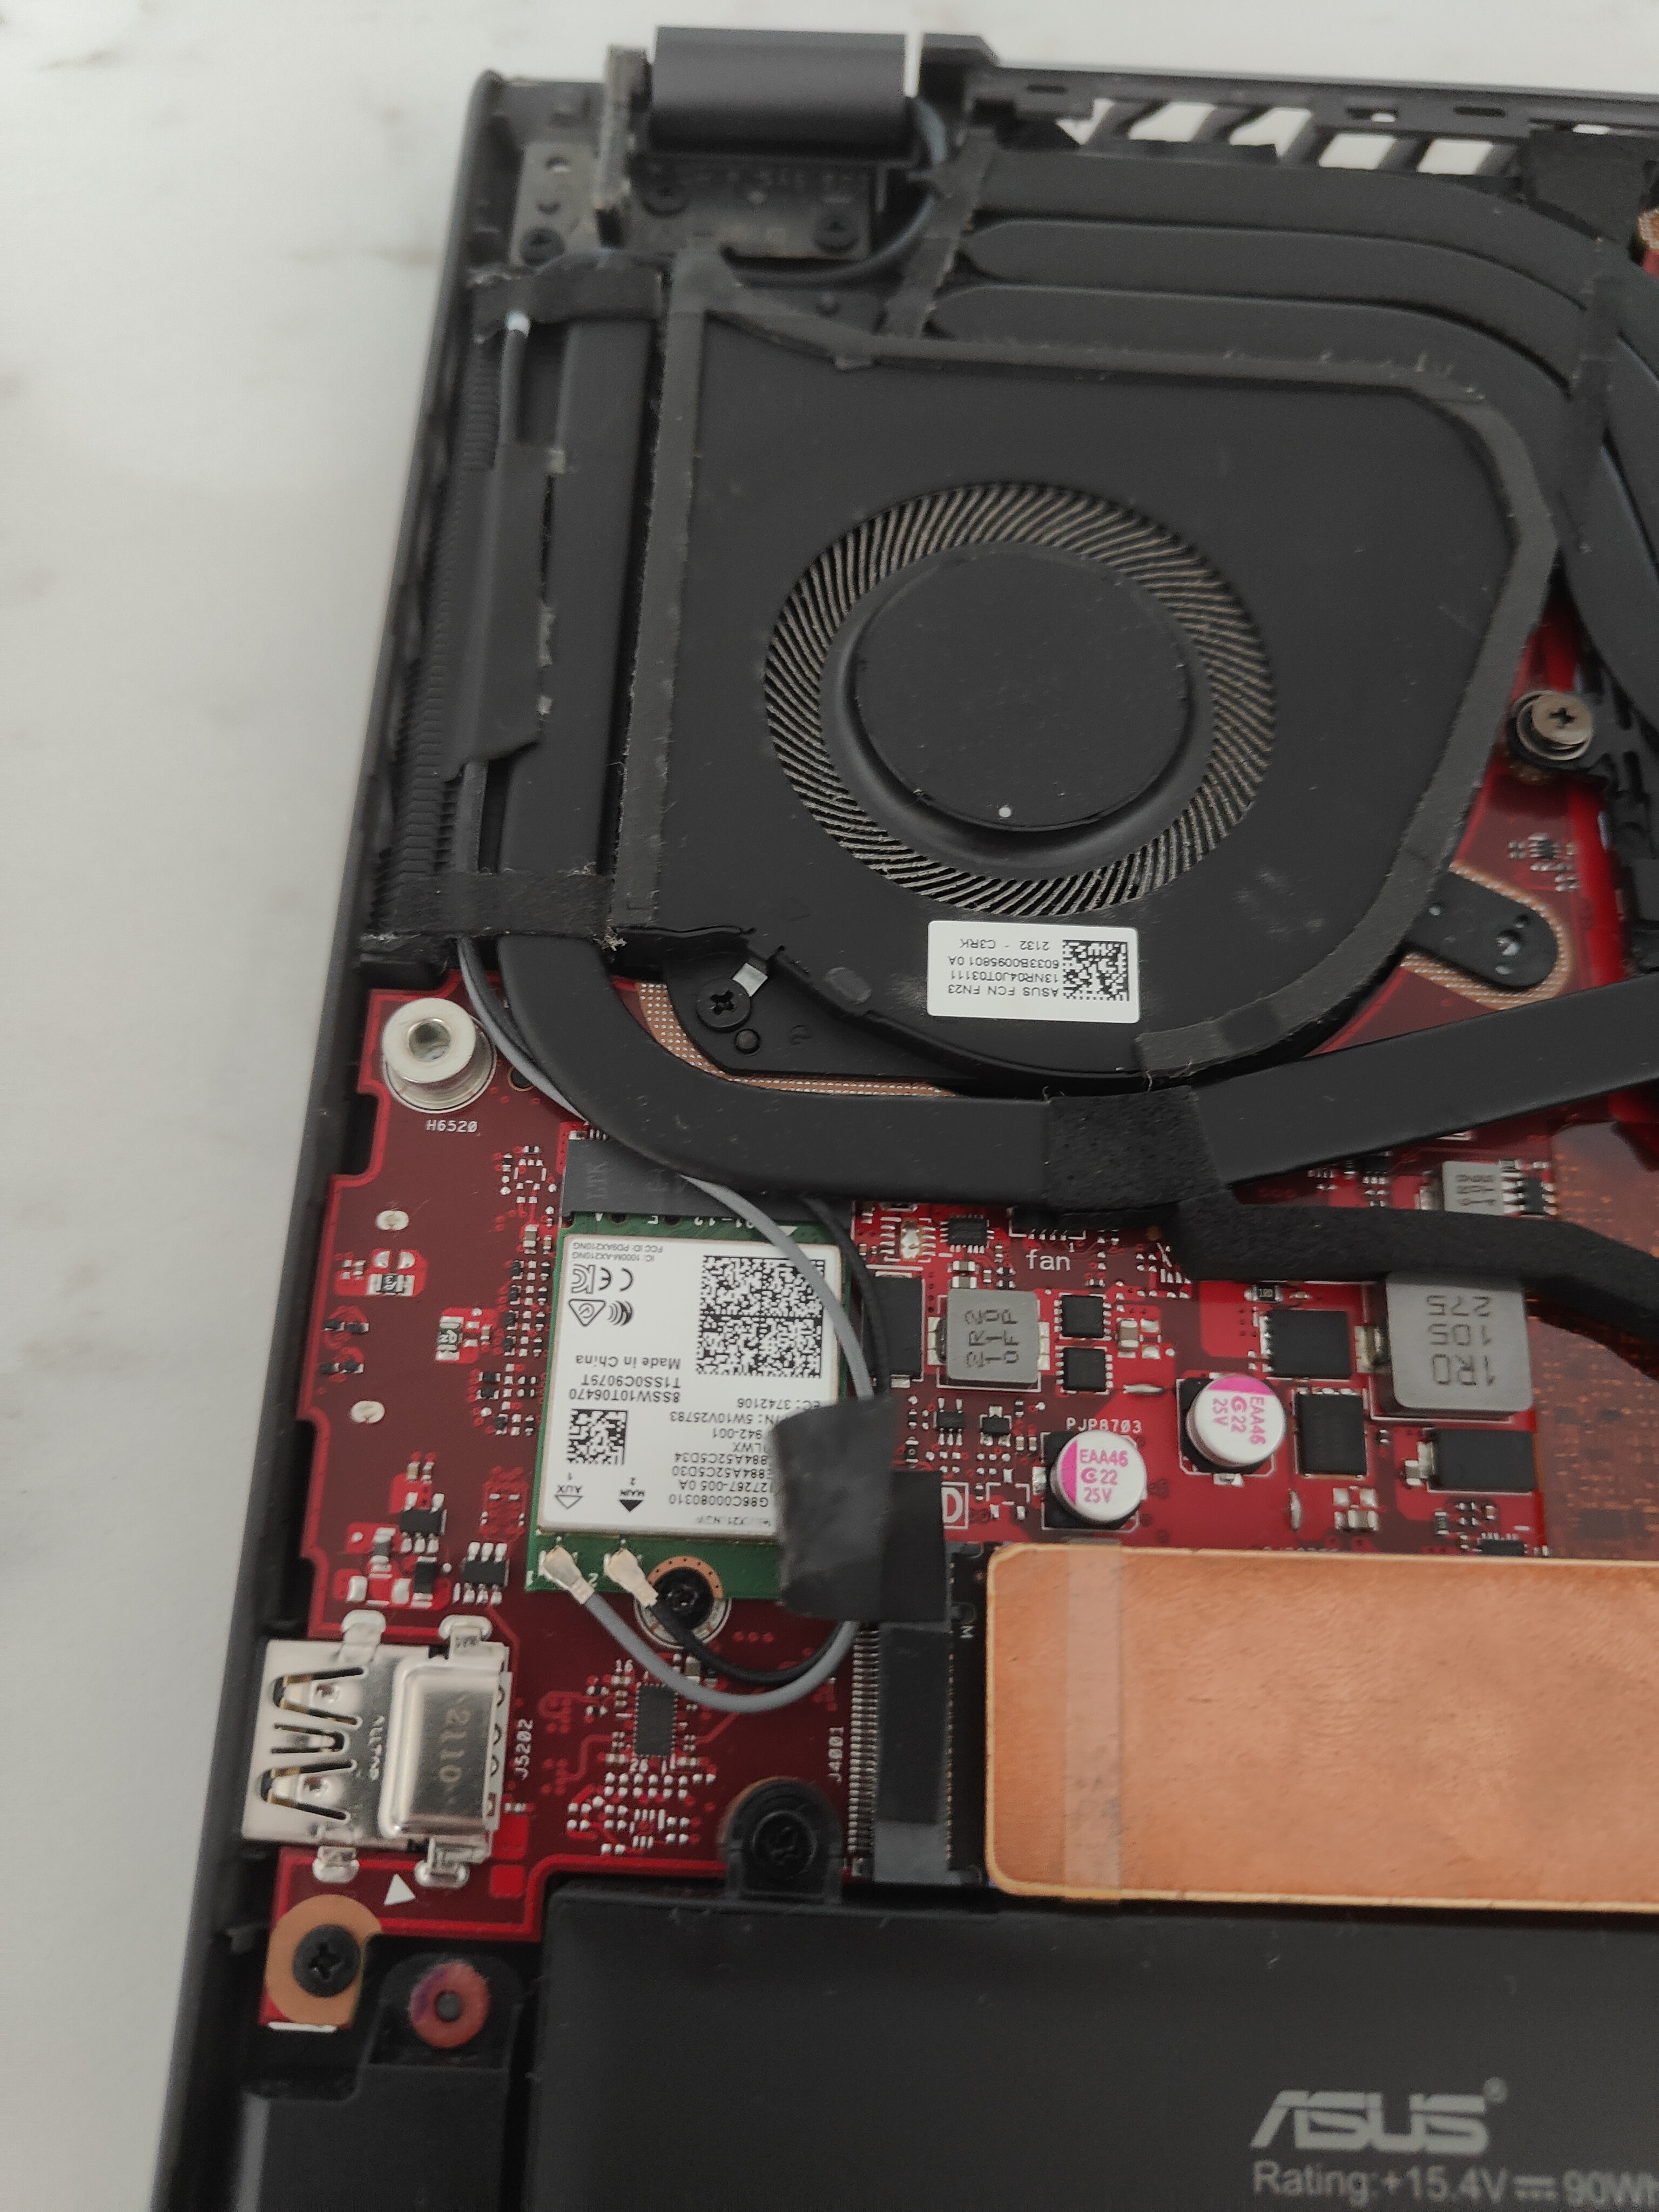
What we do need to worry about are the wireless antennae coming off of the Intel AX210 network card. They thread through the heatpipes coming off of the GPU, and need to be disconnected before the heatsink can be removed. There’s no need to pull them out fully, the heatsink just needs to be removed carefully.
The heatsink assembly is a single piece, separate from the blower fans and the motherboard. There’s a total of seven screws to remove it, three captive screws around the GPU and four non-captive screws around the CPU. There’s a specific order to follow - the numbers are written on the heatsink, but are too faint to show up in the picture.
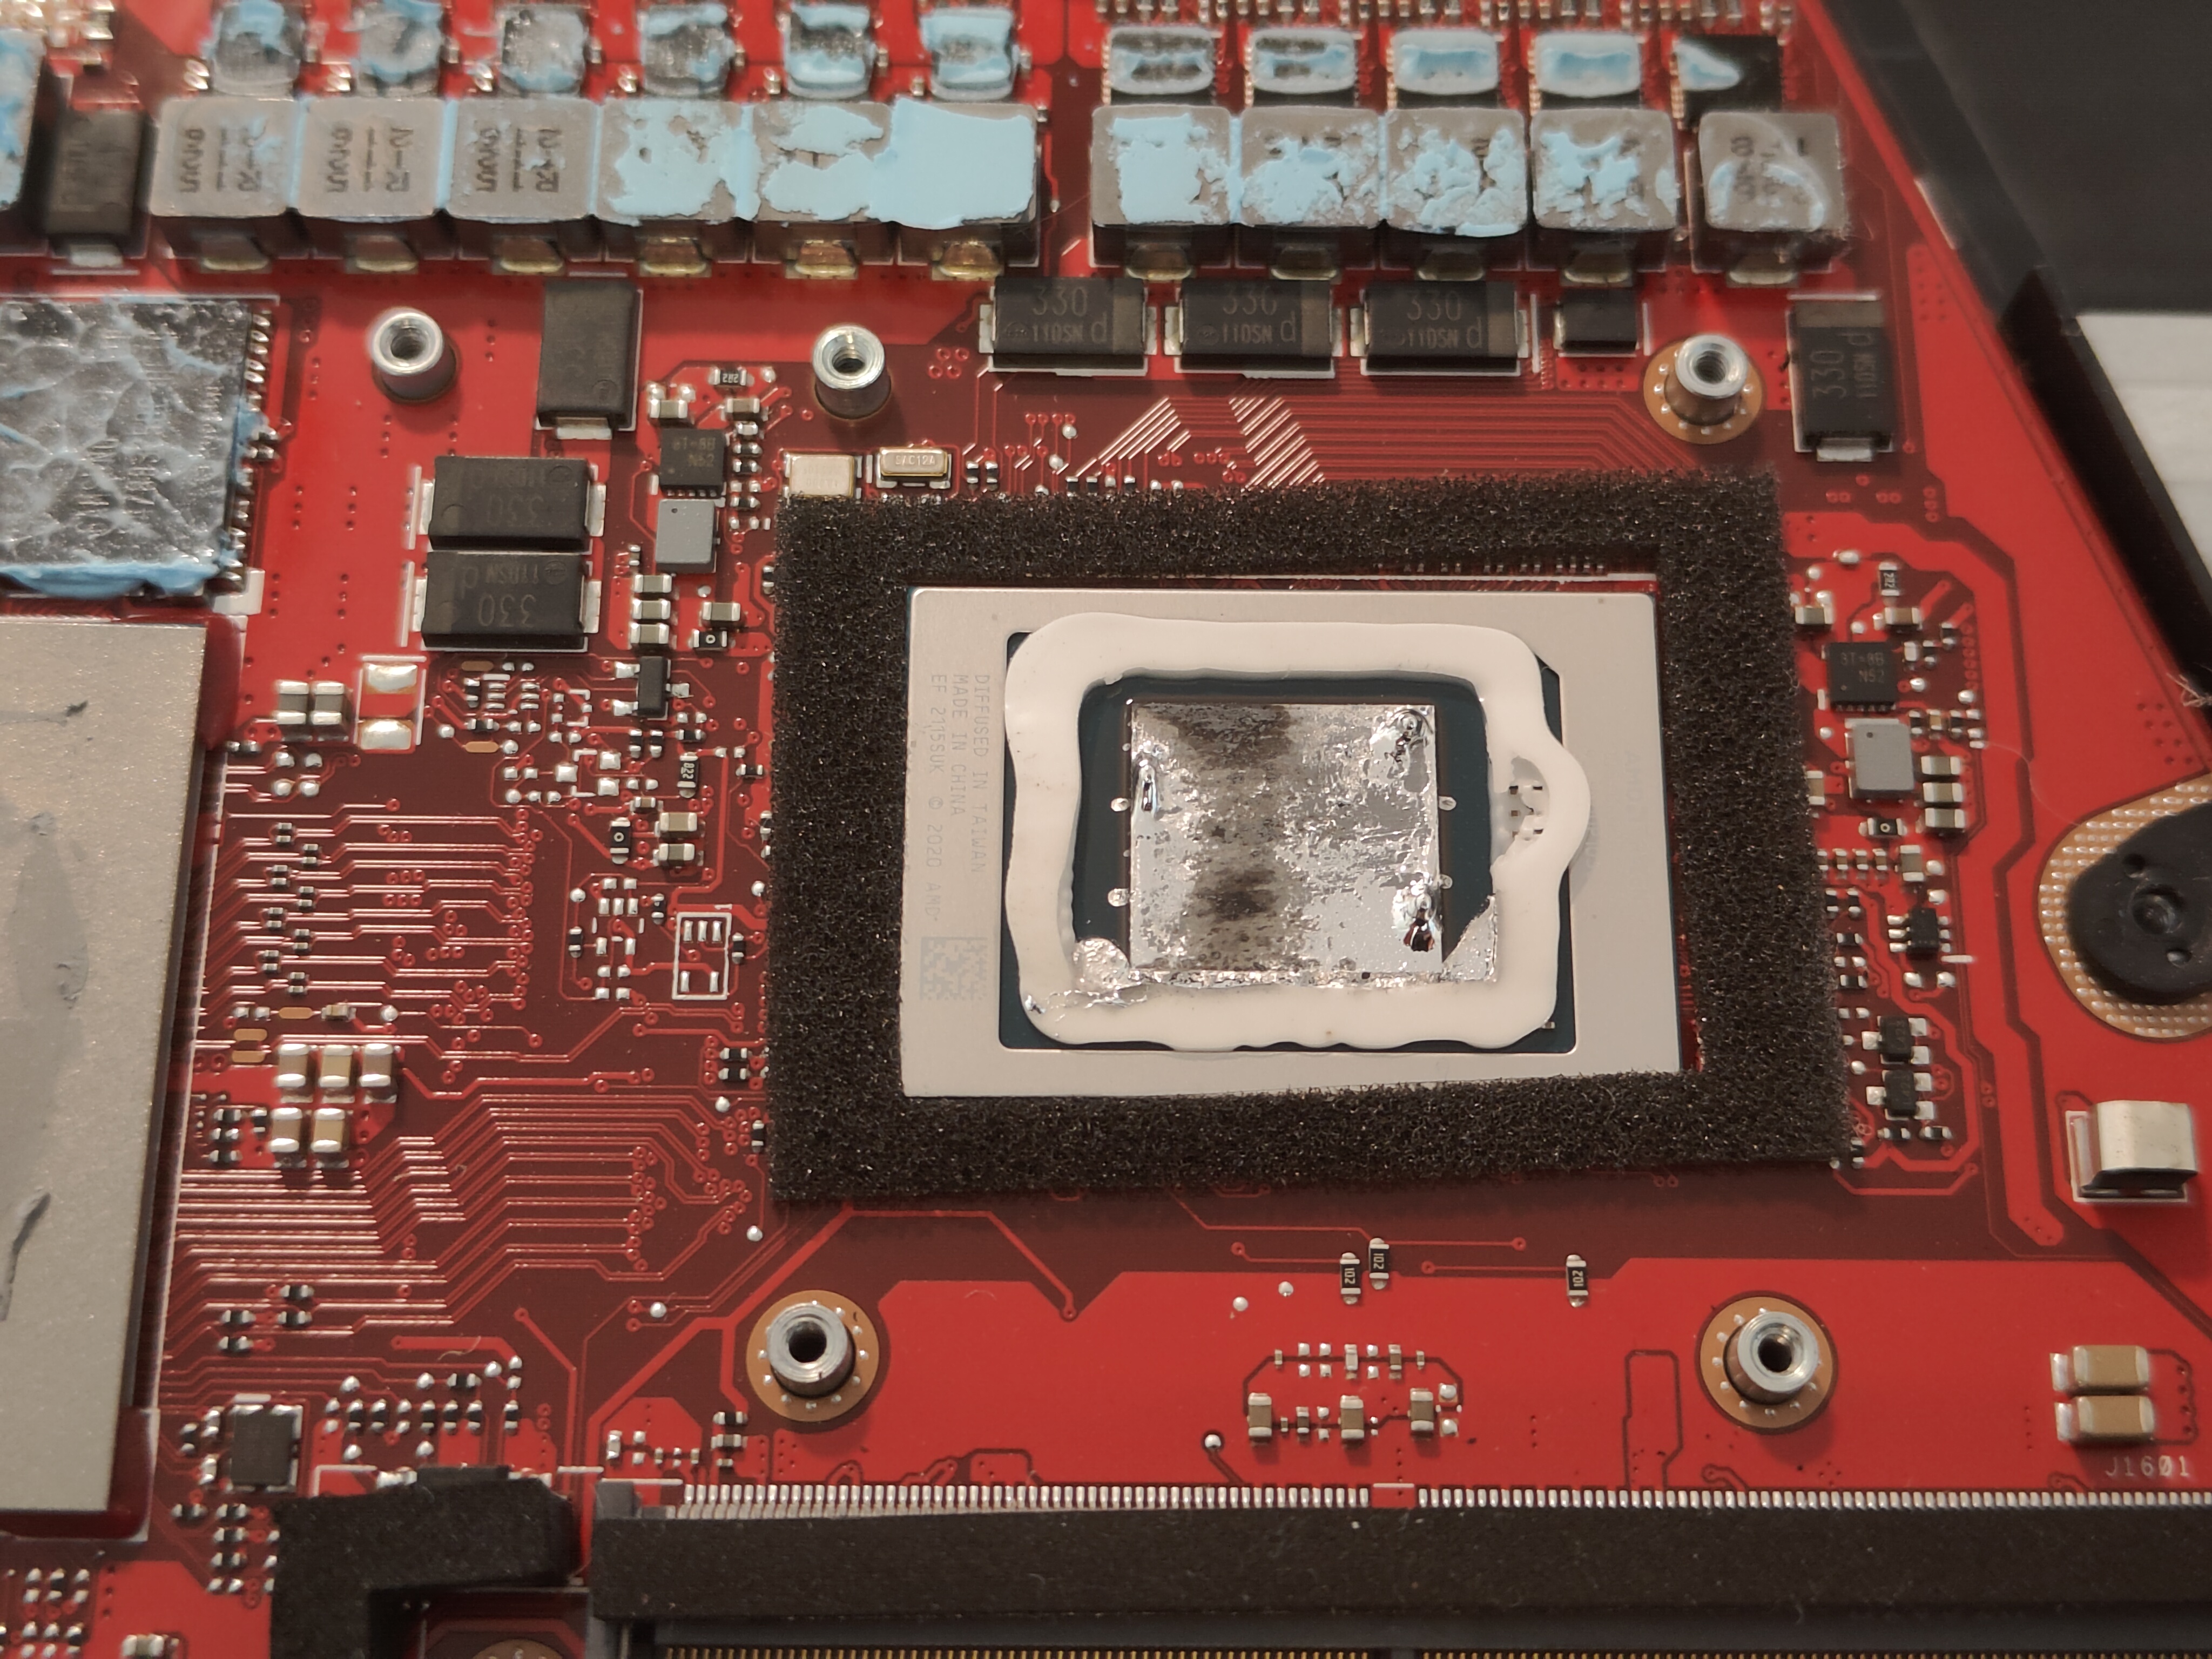
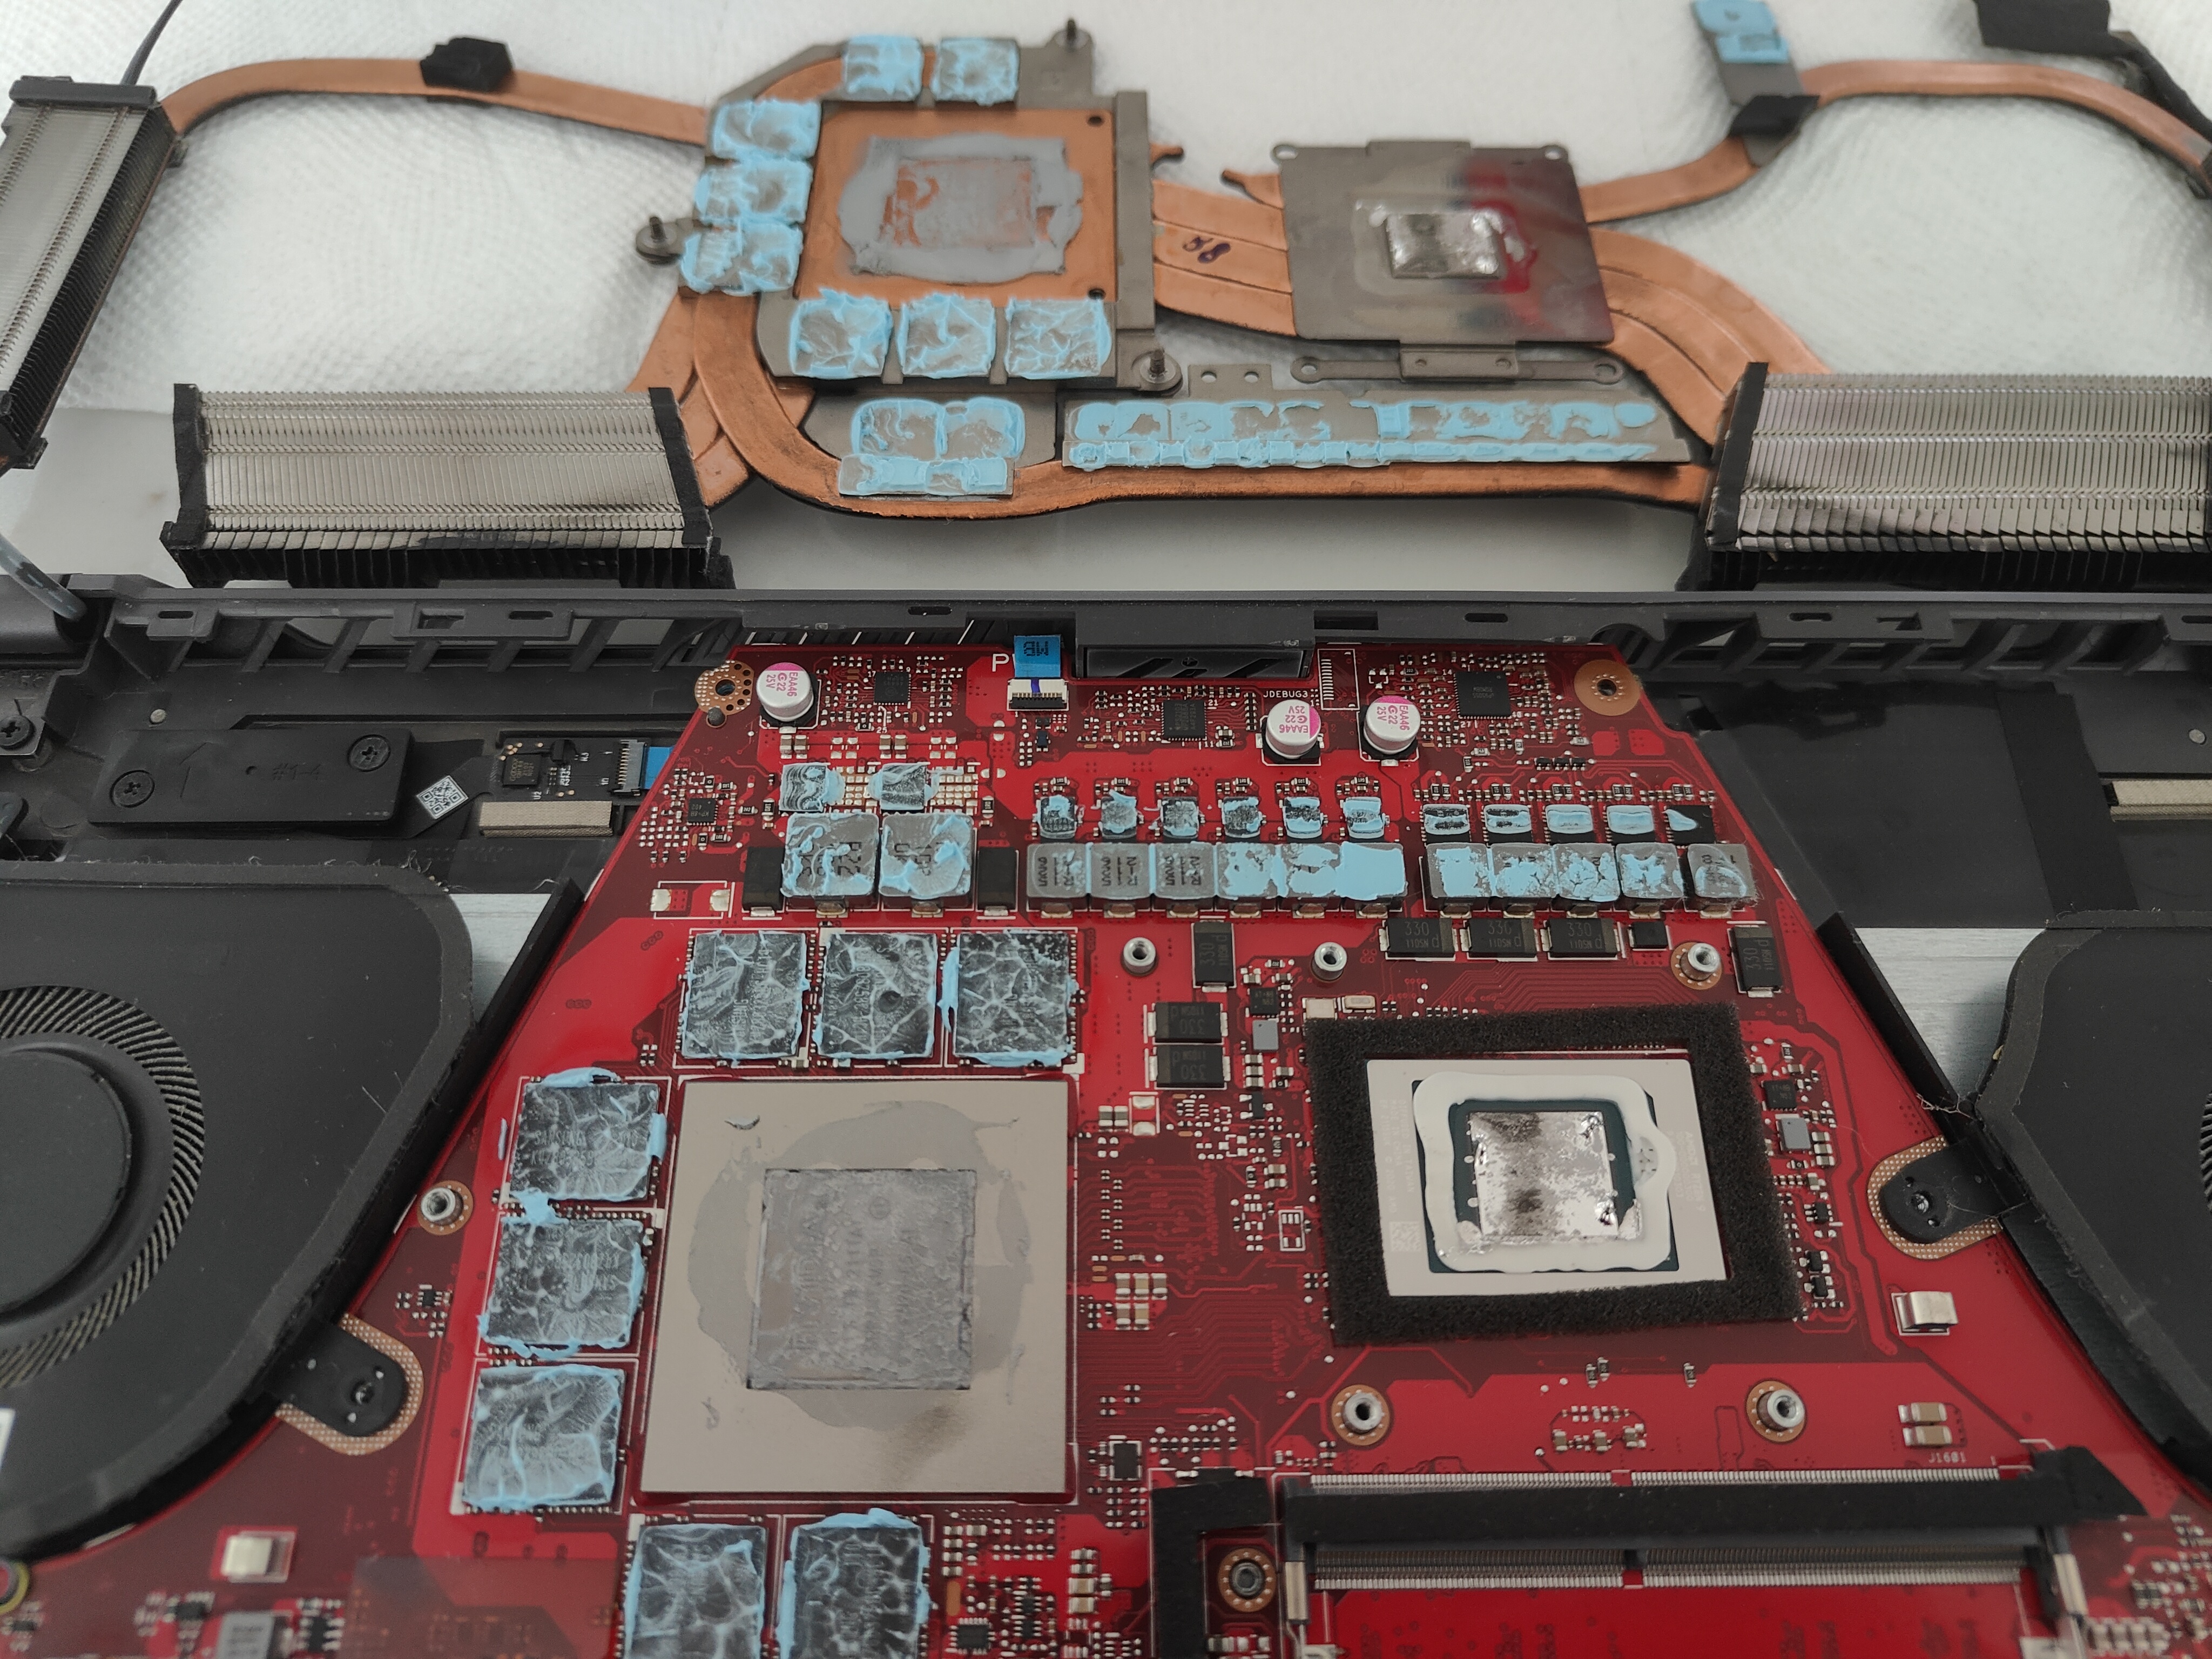
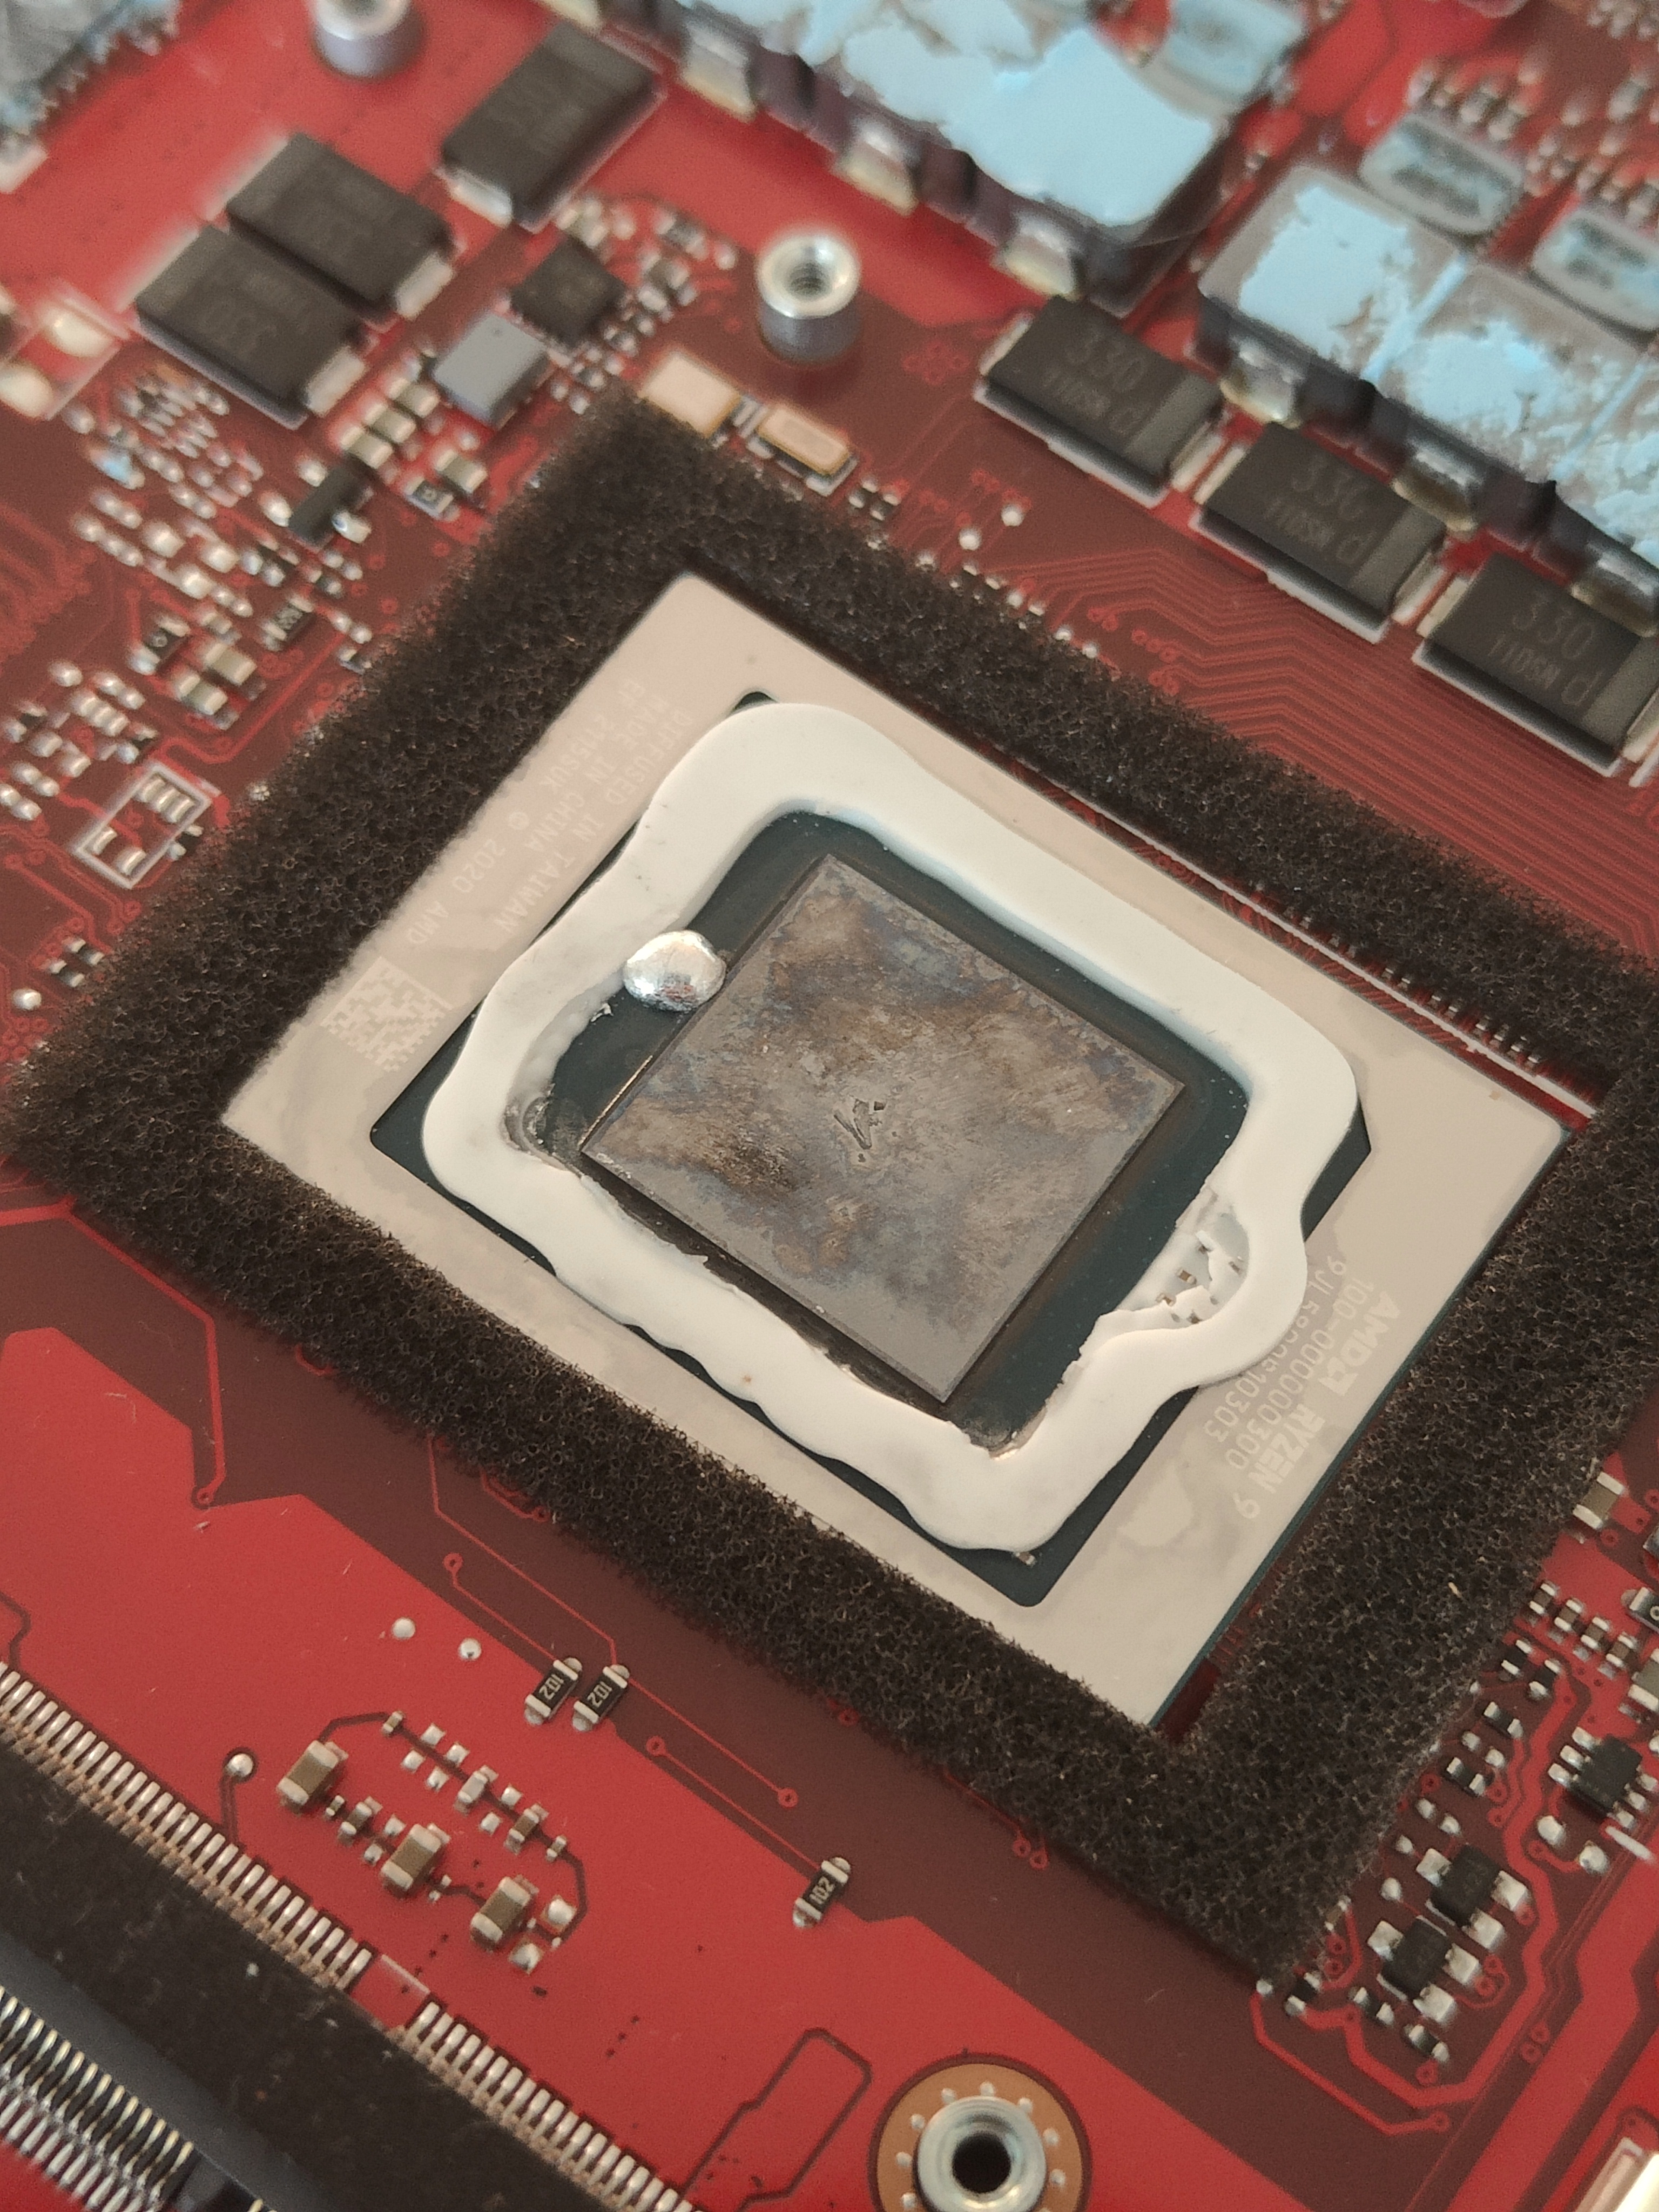
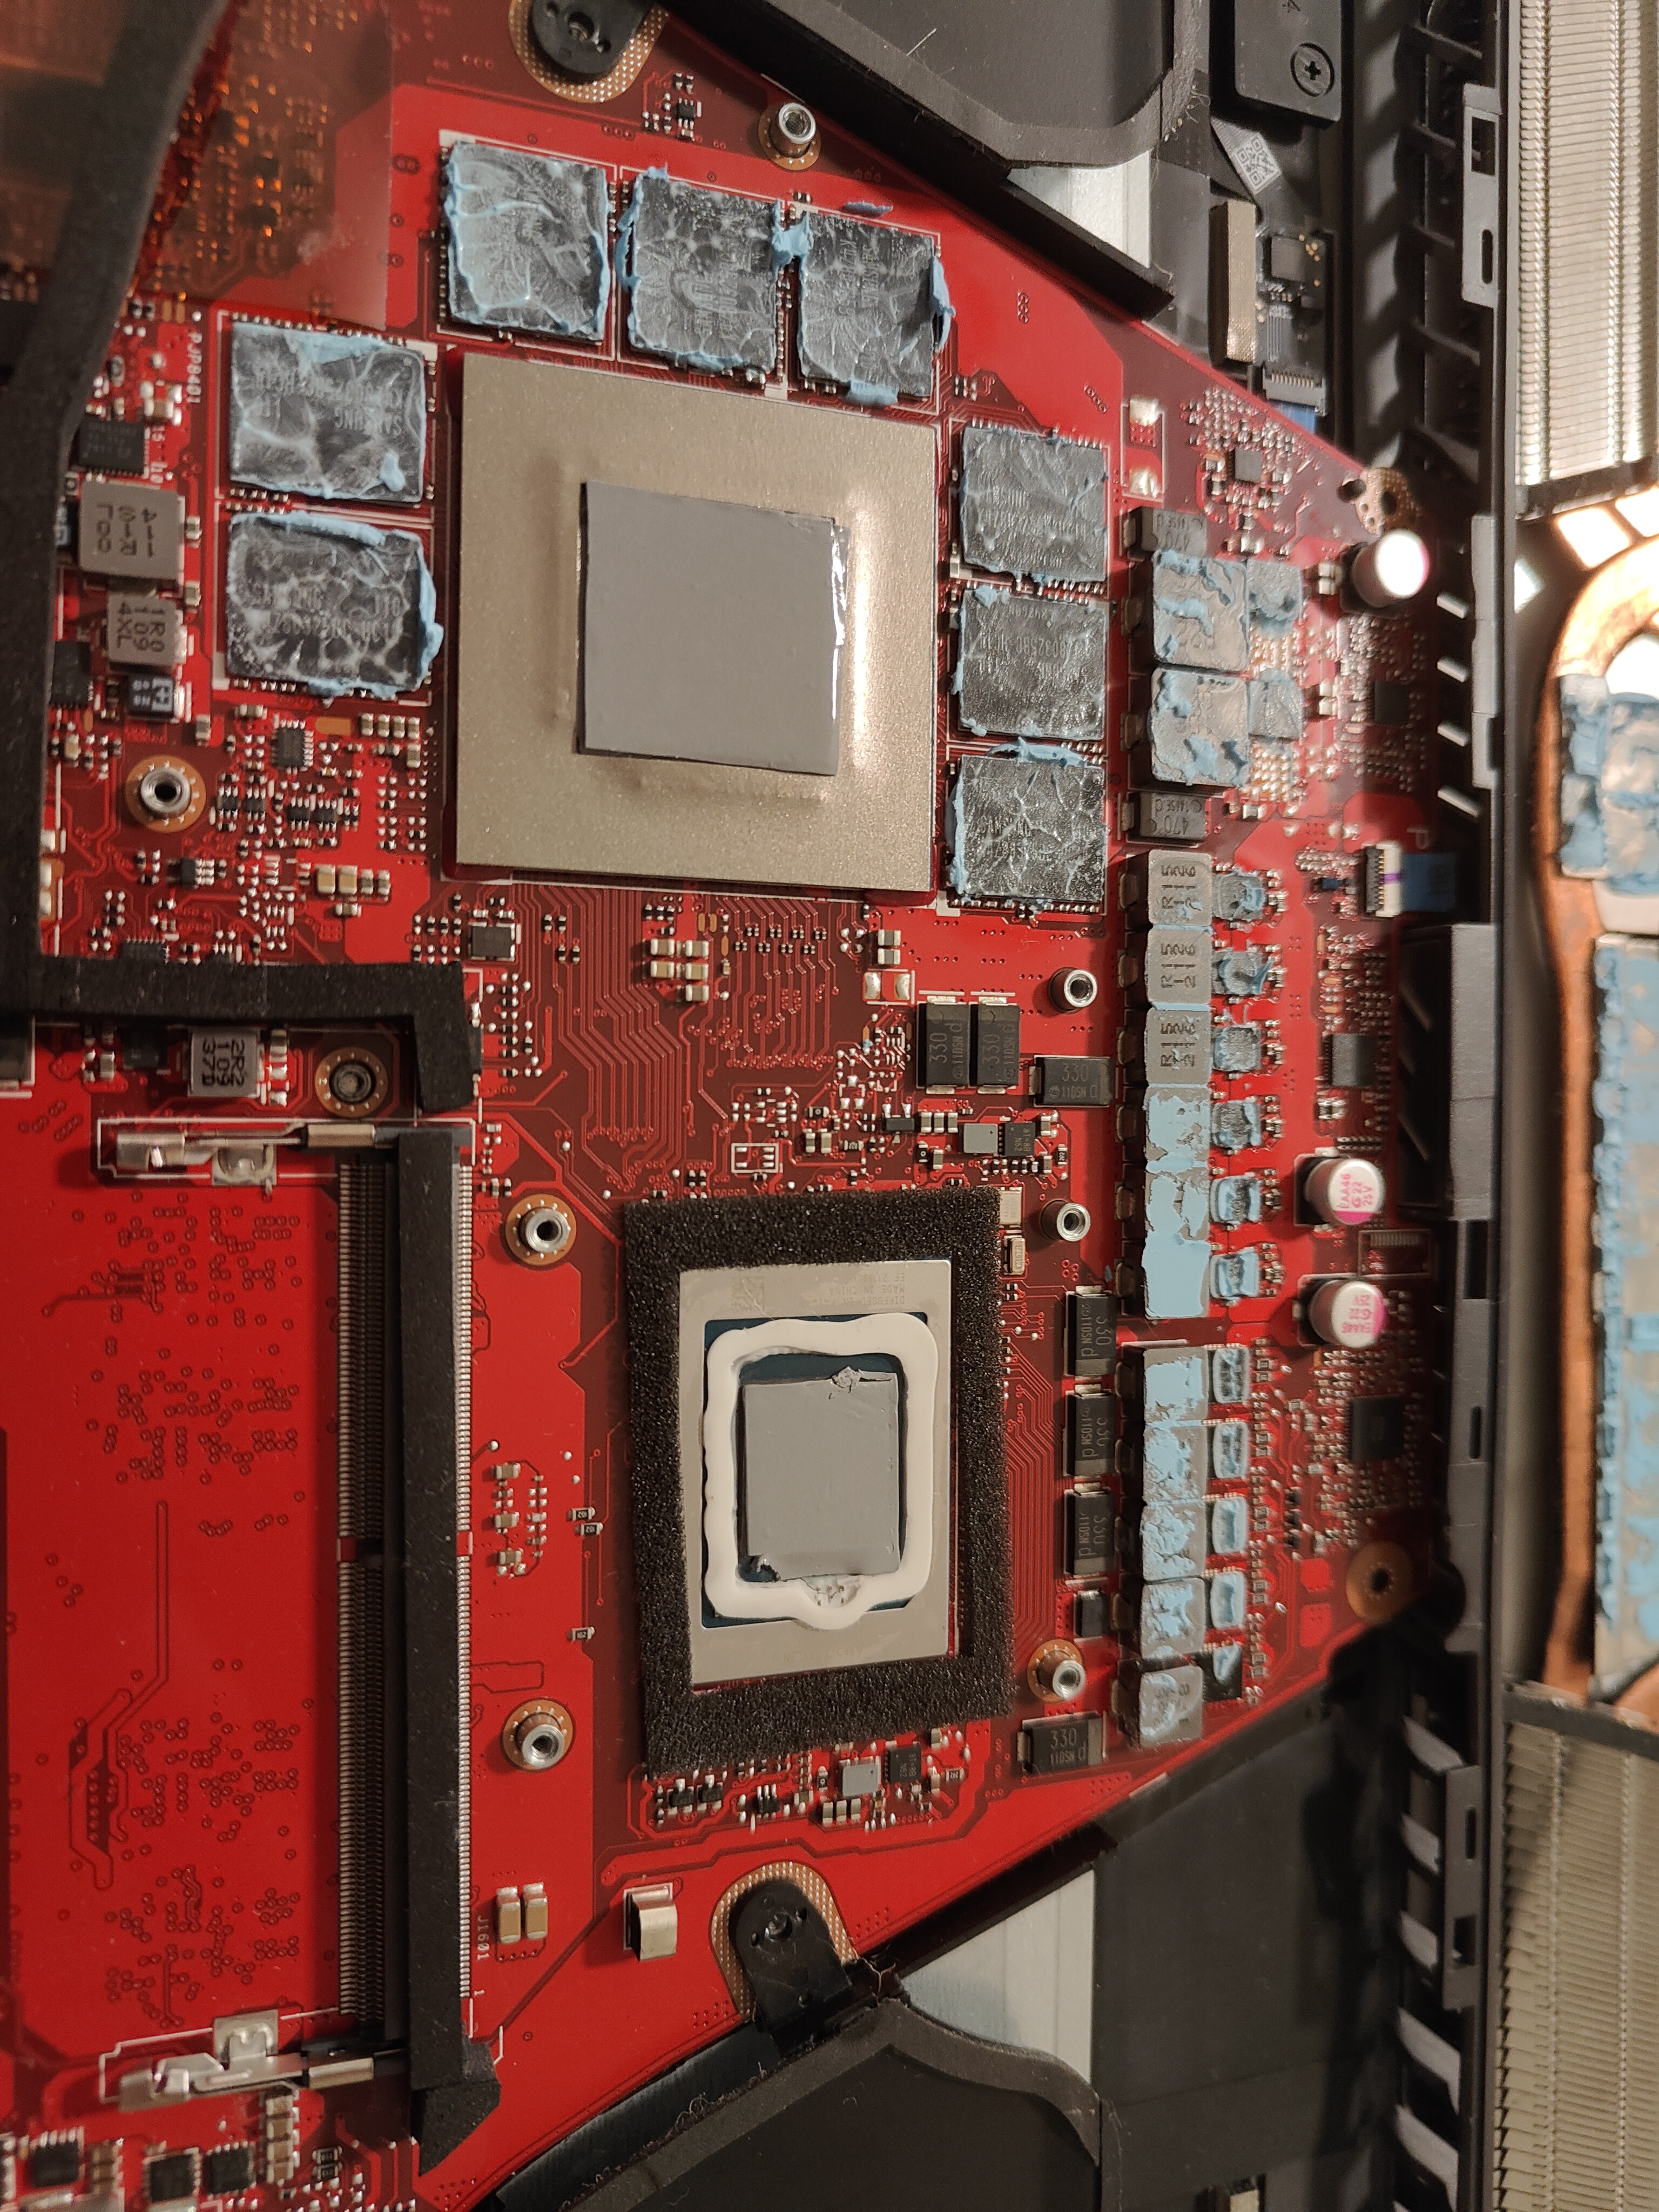
Carefully pulling off the heatsink shows just how close the liquid metal was to escaping the silicone barrier around the CPU. It looks like there was a pretty strong pump-out effect right over where the CPU cores of the Ryzen 9 5900HS should be (see the “AMD Cezanne (Zen 3)” die shot in the link). Pump out occurs when the components expand with heat and contract when they cool. Laptops are particularly susceptible to this effect because the temperature ranges are quite high (room temperature straight to ~95C in some cases), and laptops mostly use metal heatsinks that are in direct contact with the silicon underneath, which have very different thermal expansion coefficients. There’s no metal integrated heat spreader (IHS) soldered to the silicon like in most desktop applications, and the heatsink pressures are usually lower in laptops.
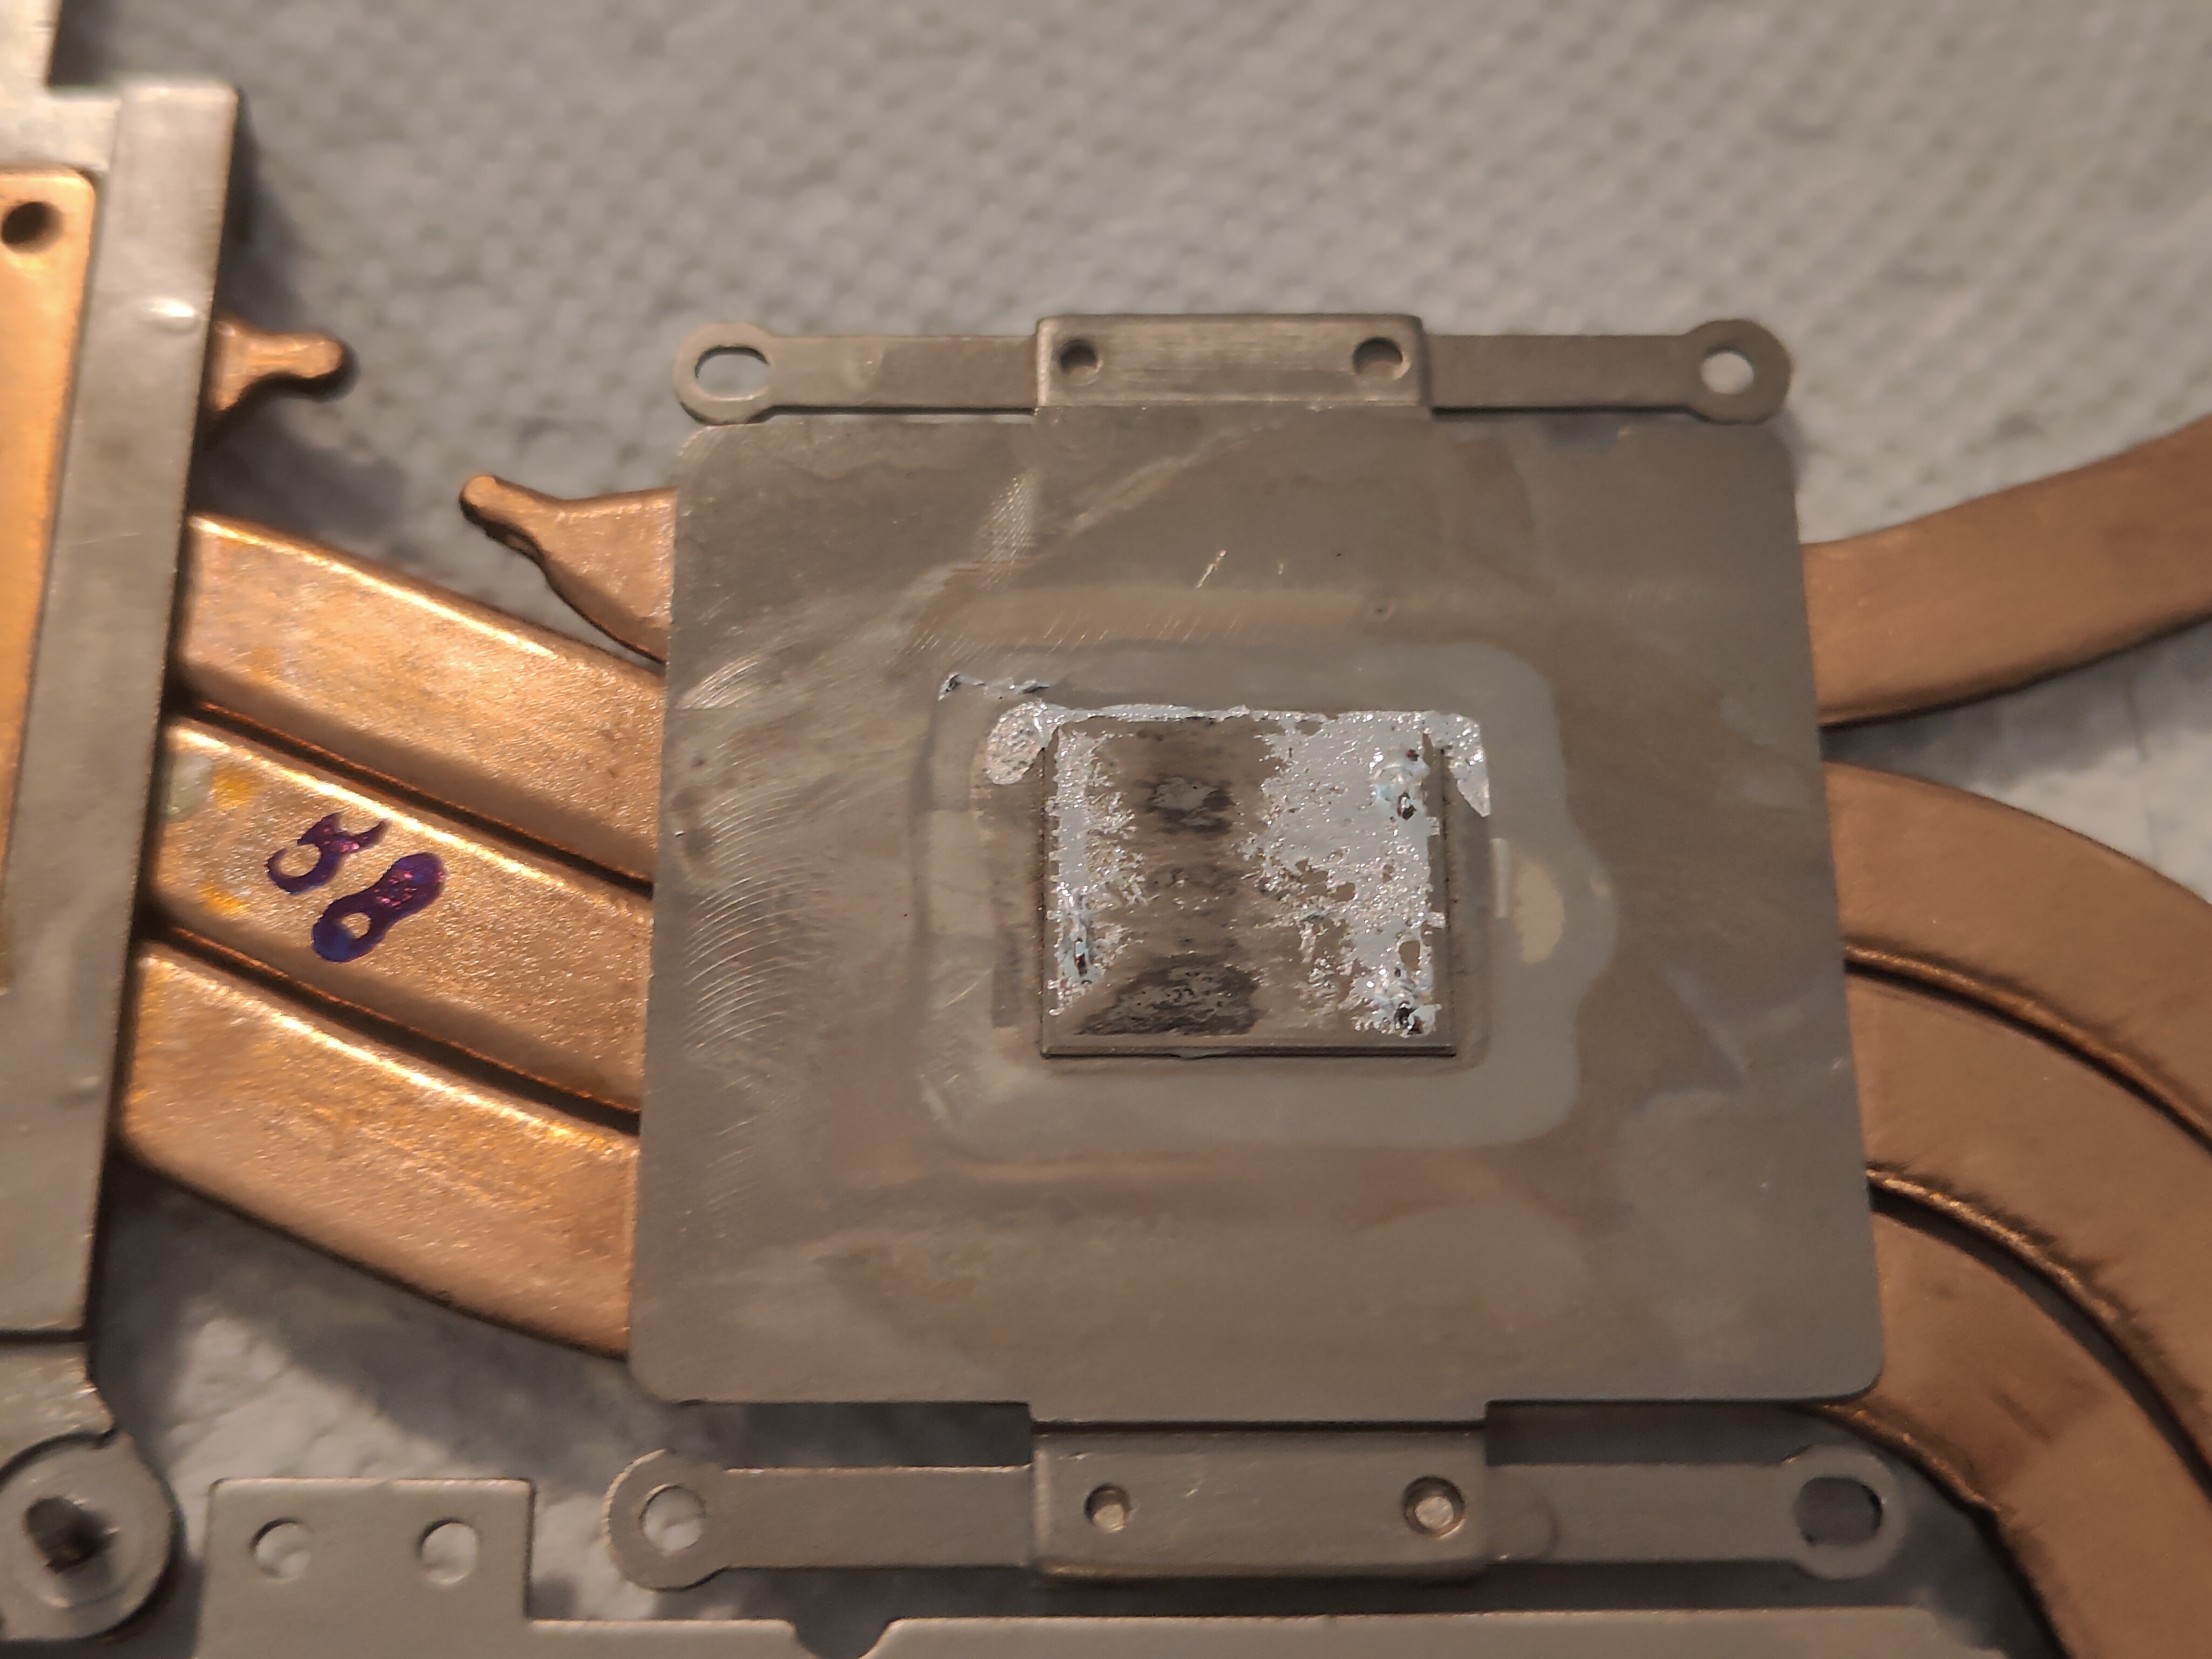
Looking at the CPU heatsink, we can see the same pump out effect on the other side. The heatsink is copper, but plated with what is likely nickel due to the reaction between liquid metal and pure copper. Cleaning off the heatsink was fairly straightfoward - plenty of paper towels and isopropyl alcohol did the trick. Make sure to wipe it off carefully, as the liquid metal won’t really absorb into the paper towel - it’s more of a “scooping up” approach than anything else.
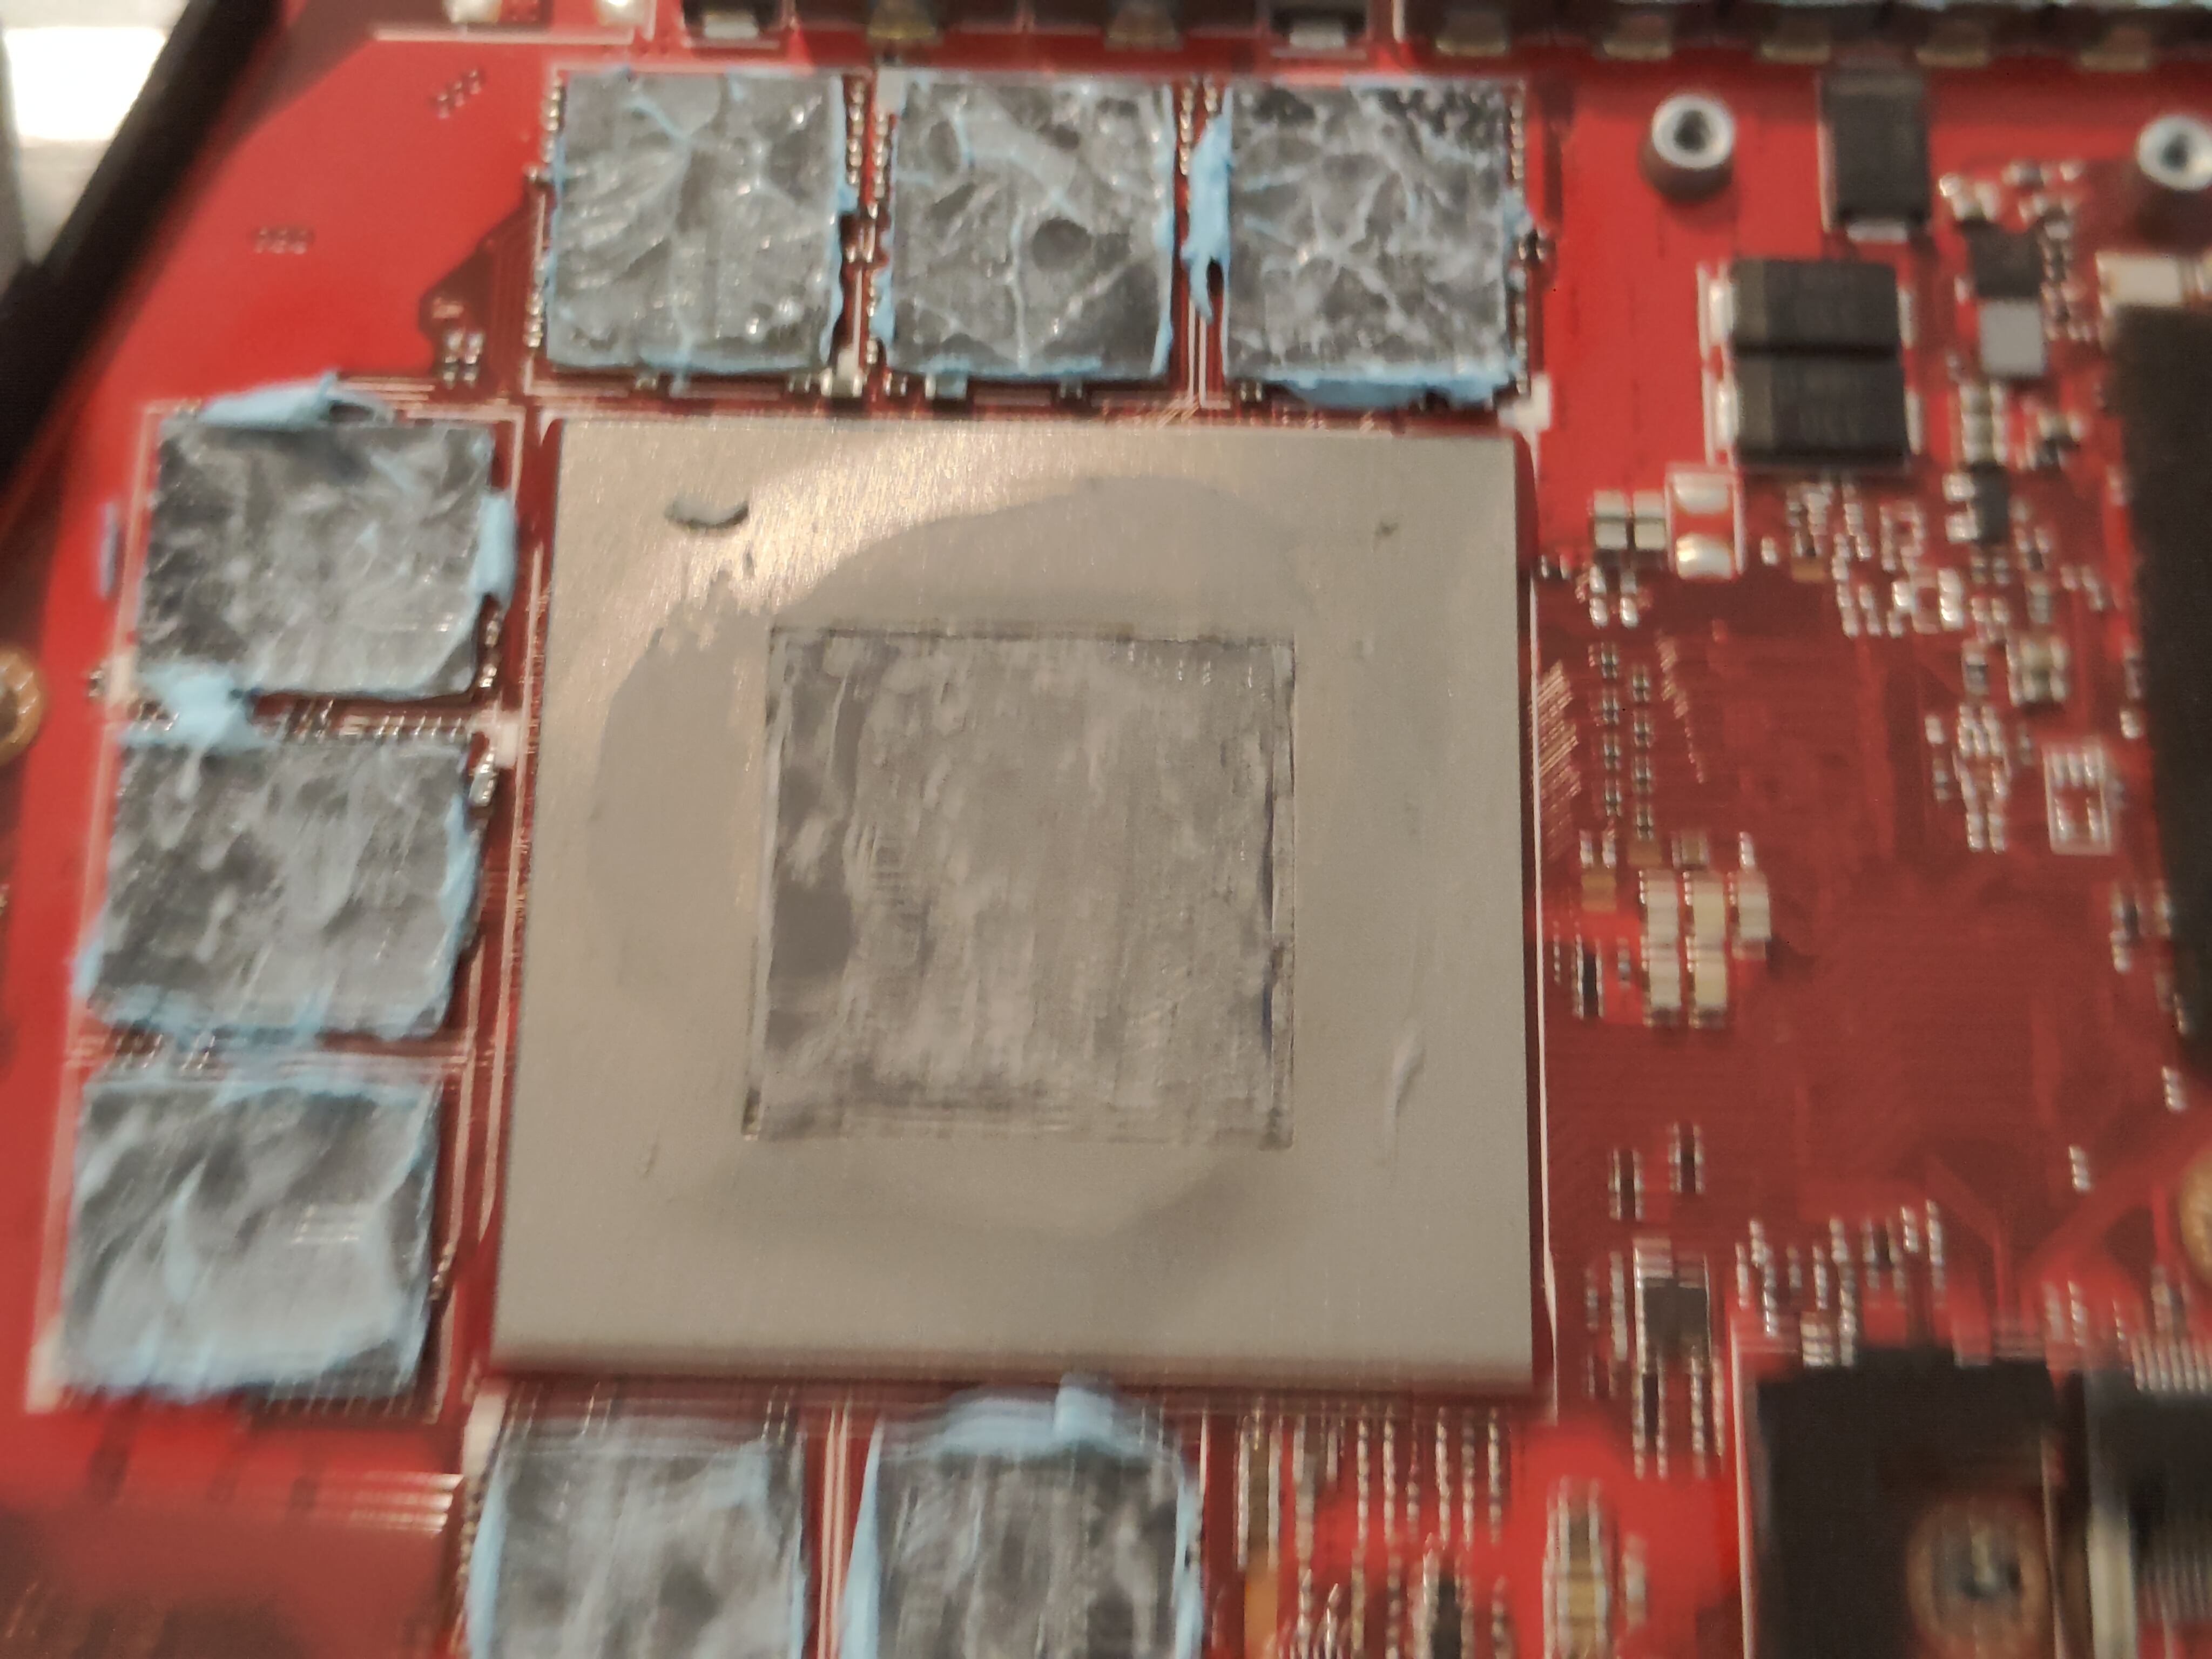
On to the GPU, which is just covered in a ton of factory paste rather than liquid metal. There’s a thicker, different paste used for the eight GDDR6 memory chips around the GPU - make sure you don’t remove that from the chips or the heatsink, as it’s perfectly reusable. The thermal paste was quite dry, but isopropyl alcohol dissolves it and a good soak got it off easily. There are SMD components under the grey cover around the GPU die, so be careful when wiping off paste.
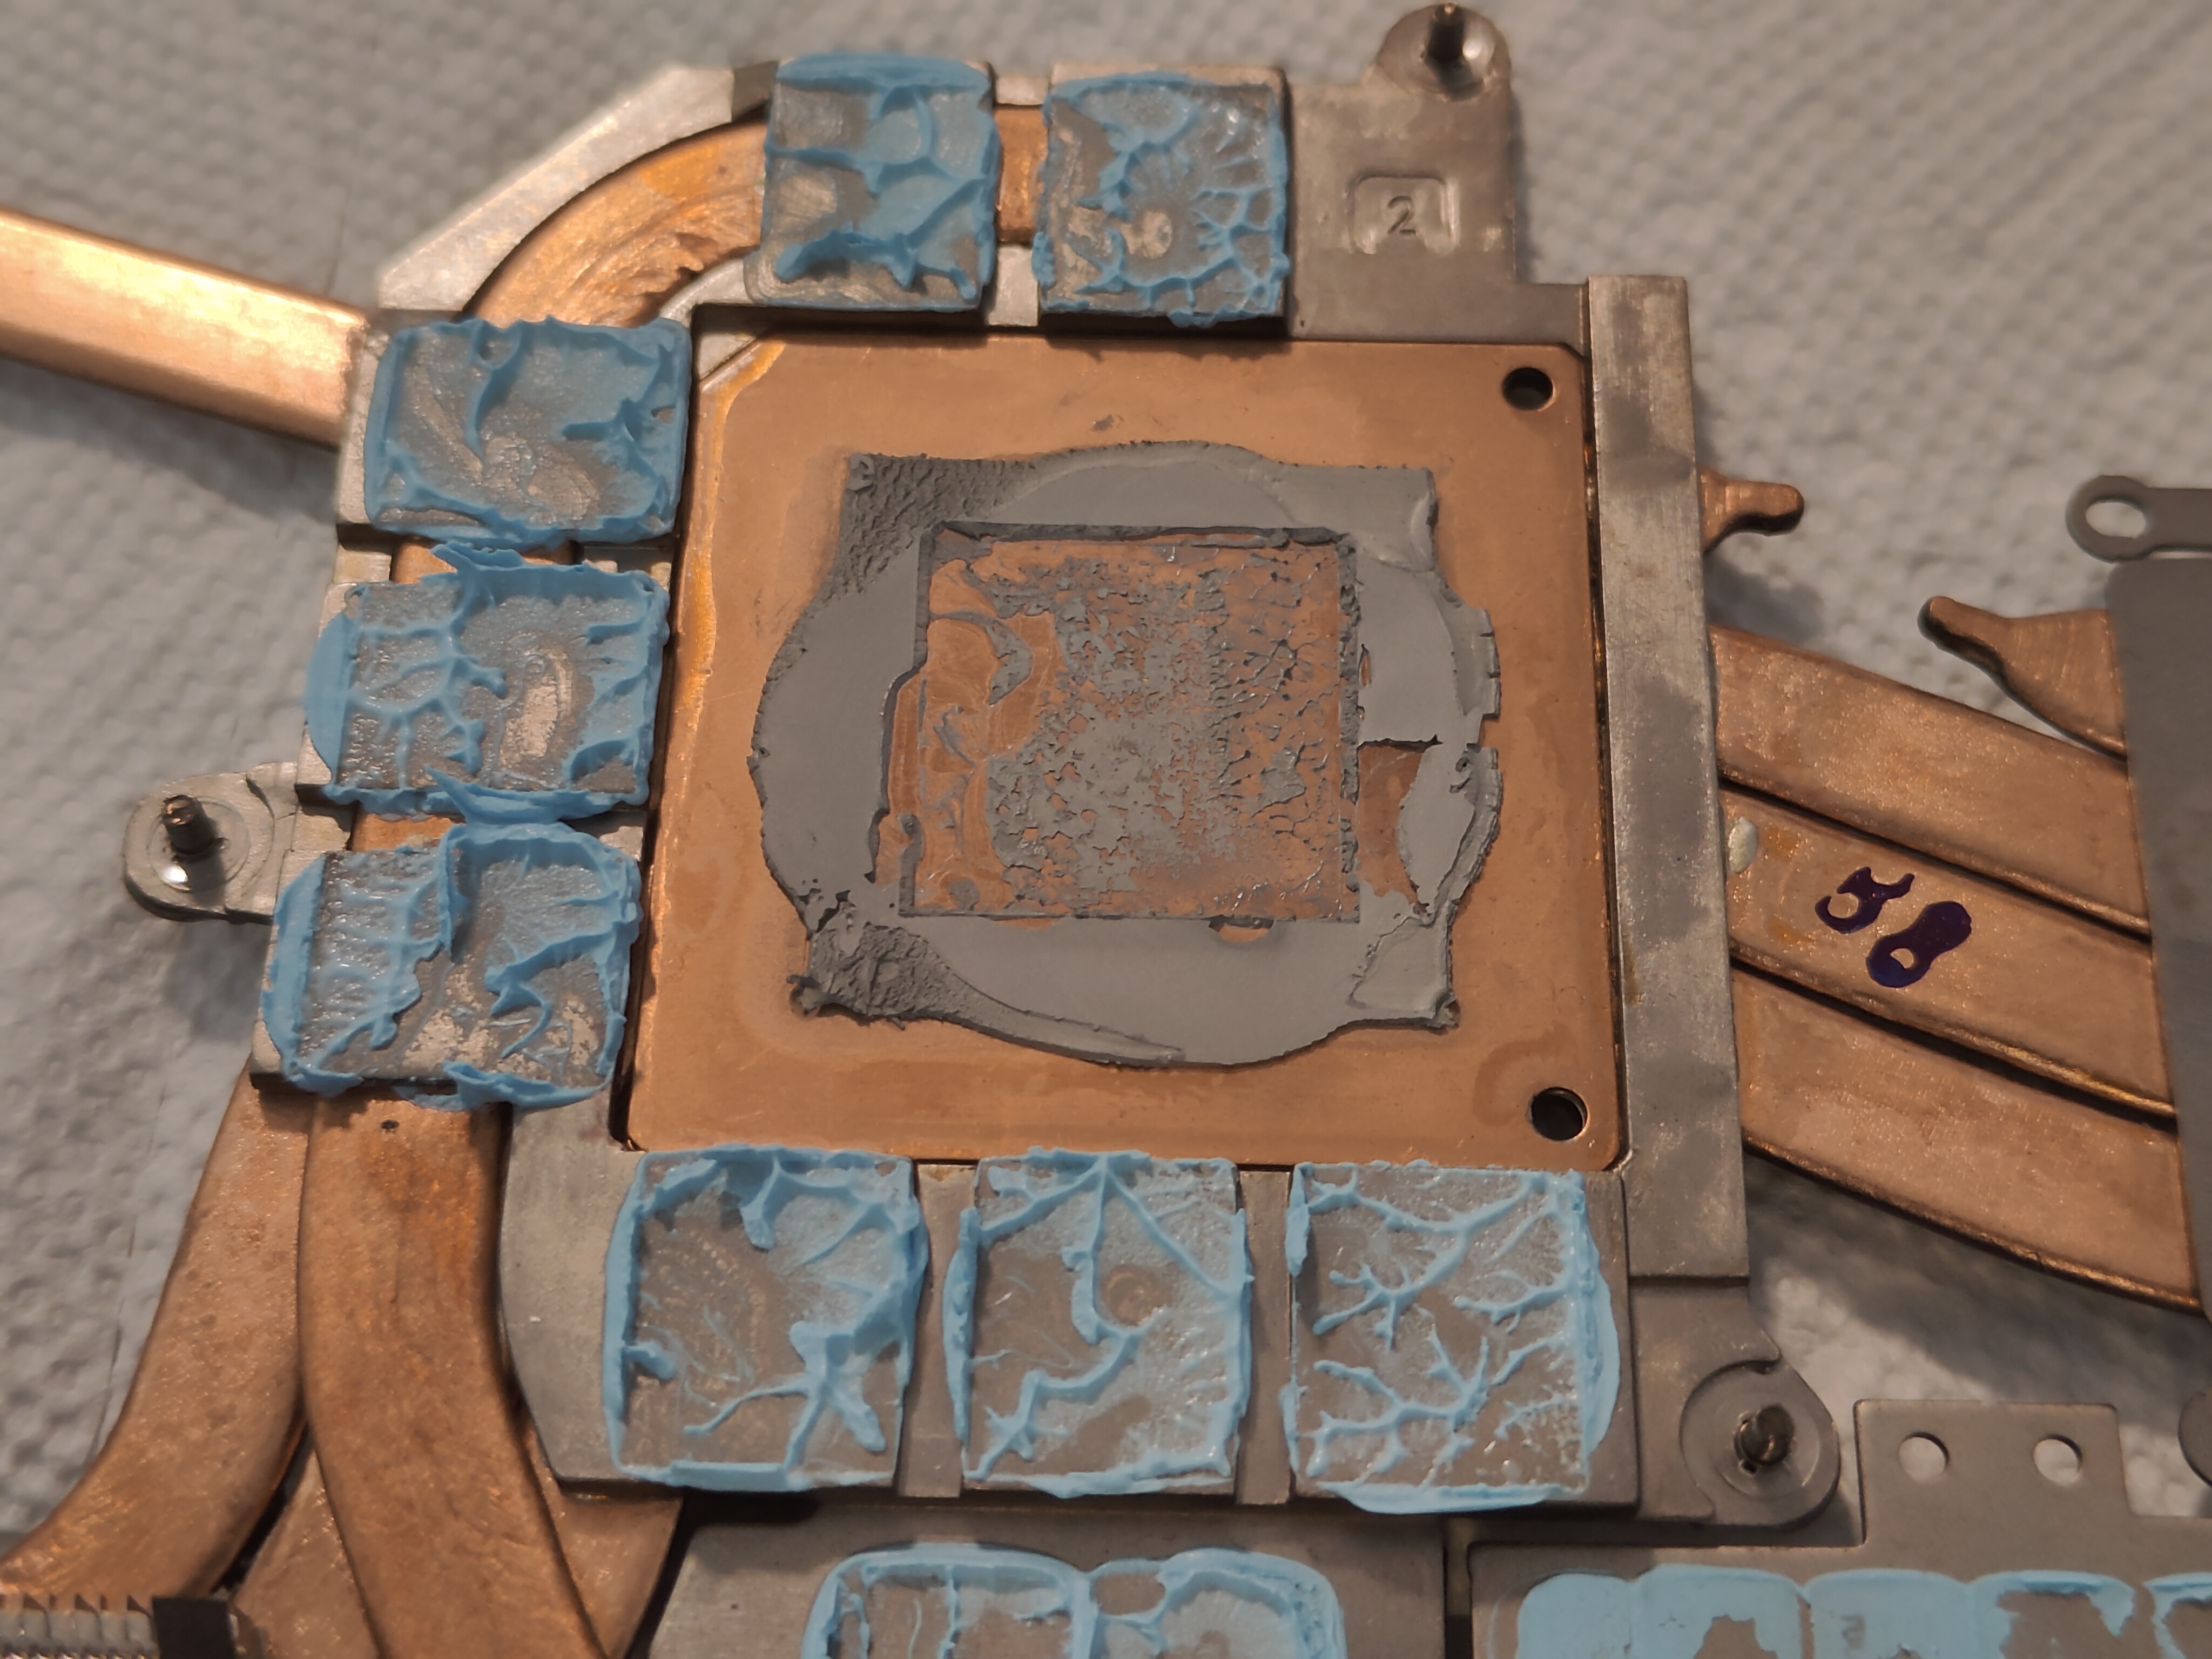
The GPU side of the heatsink is much the same as the GPU itself - dry thermal paste surrounded by more blue memory goop. Wipe off the paste but leave the goop. It is technically possible to replace the goop with thermal pads, but putting pads that are too thick there would massively decrease the mounting pressure between the heatsink and GPU die, and that’d be much worse than old and dry thermal paste.
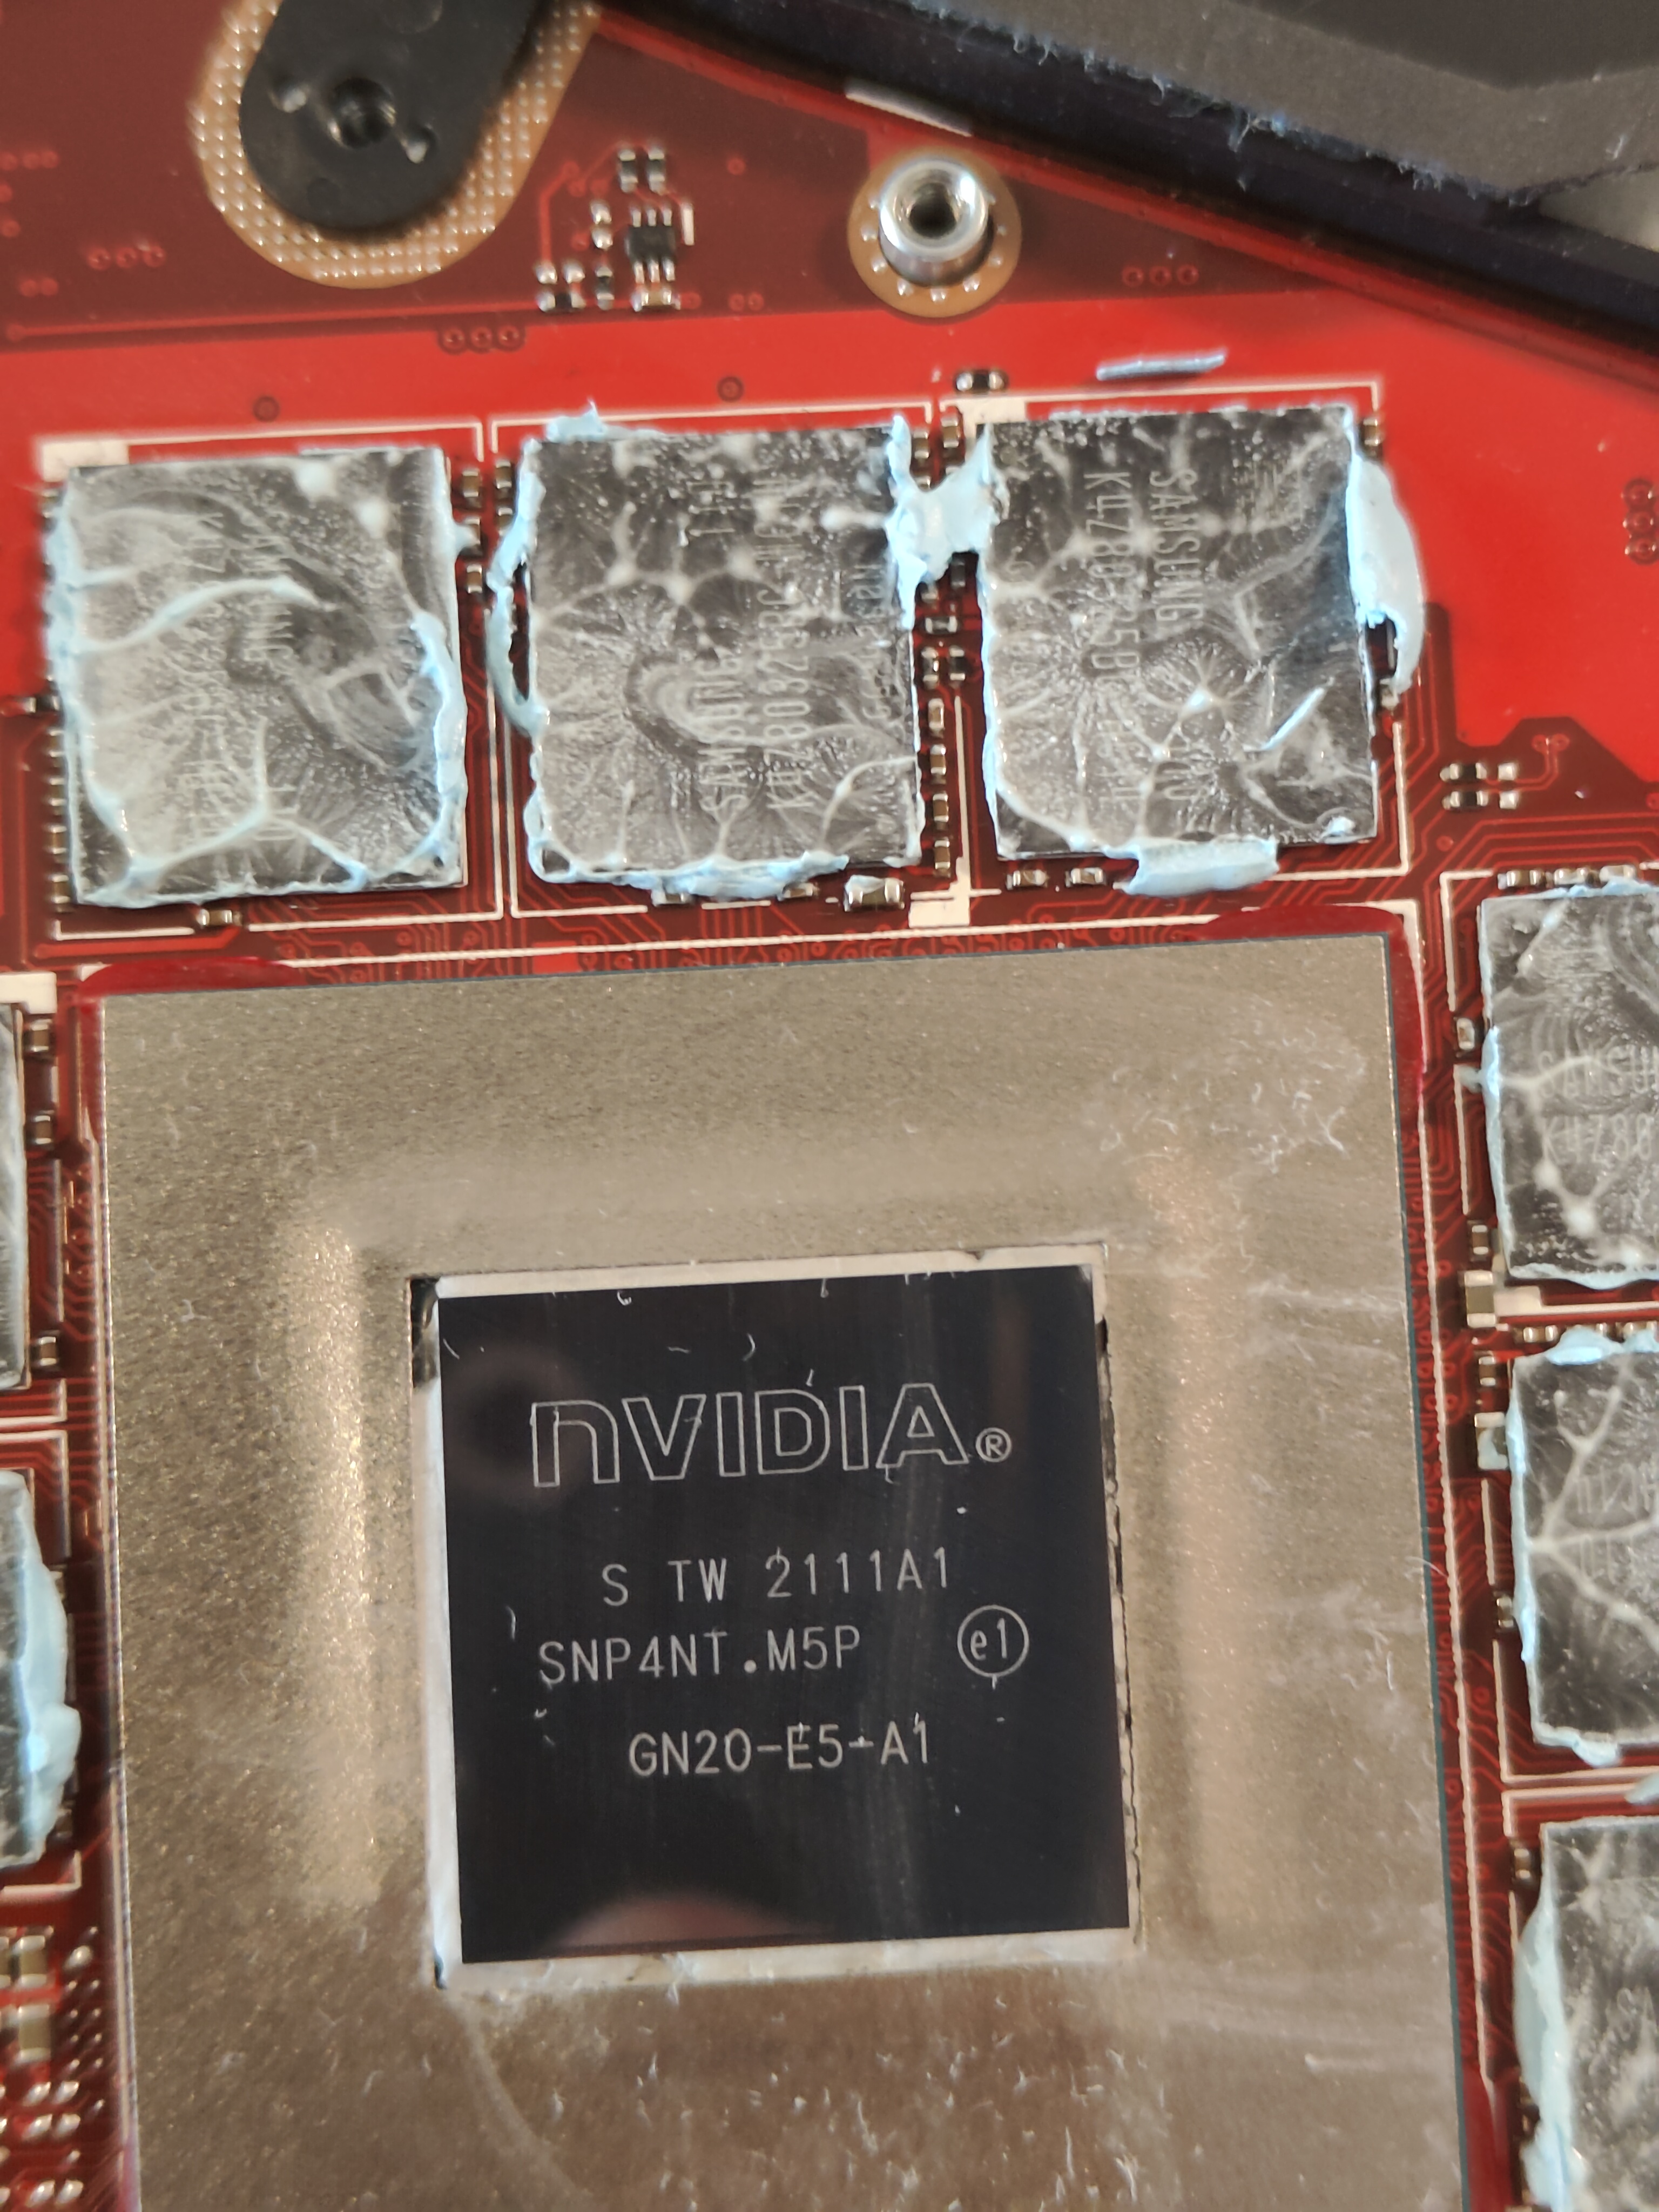
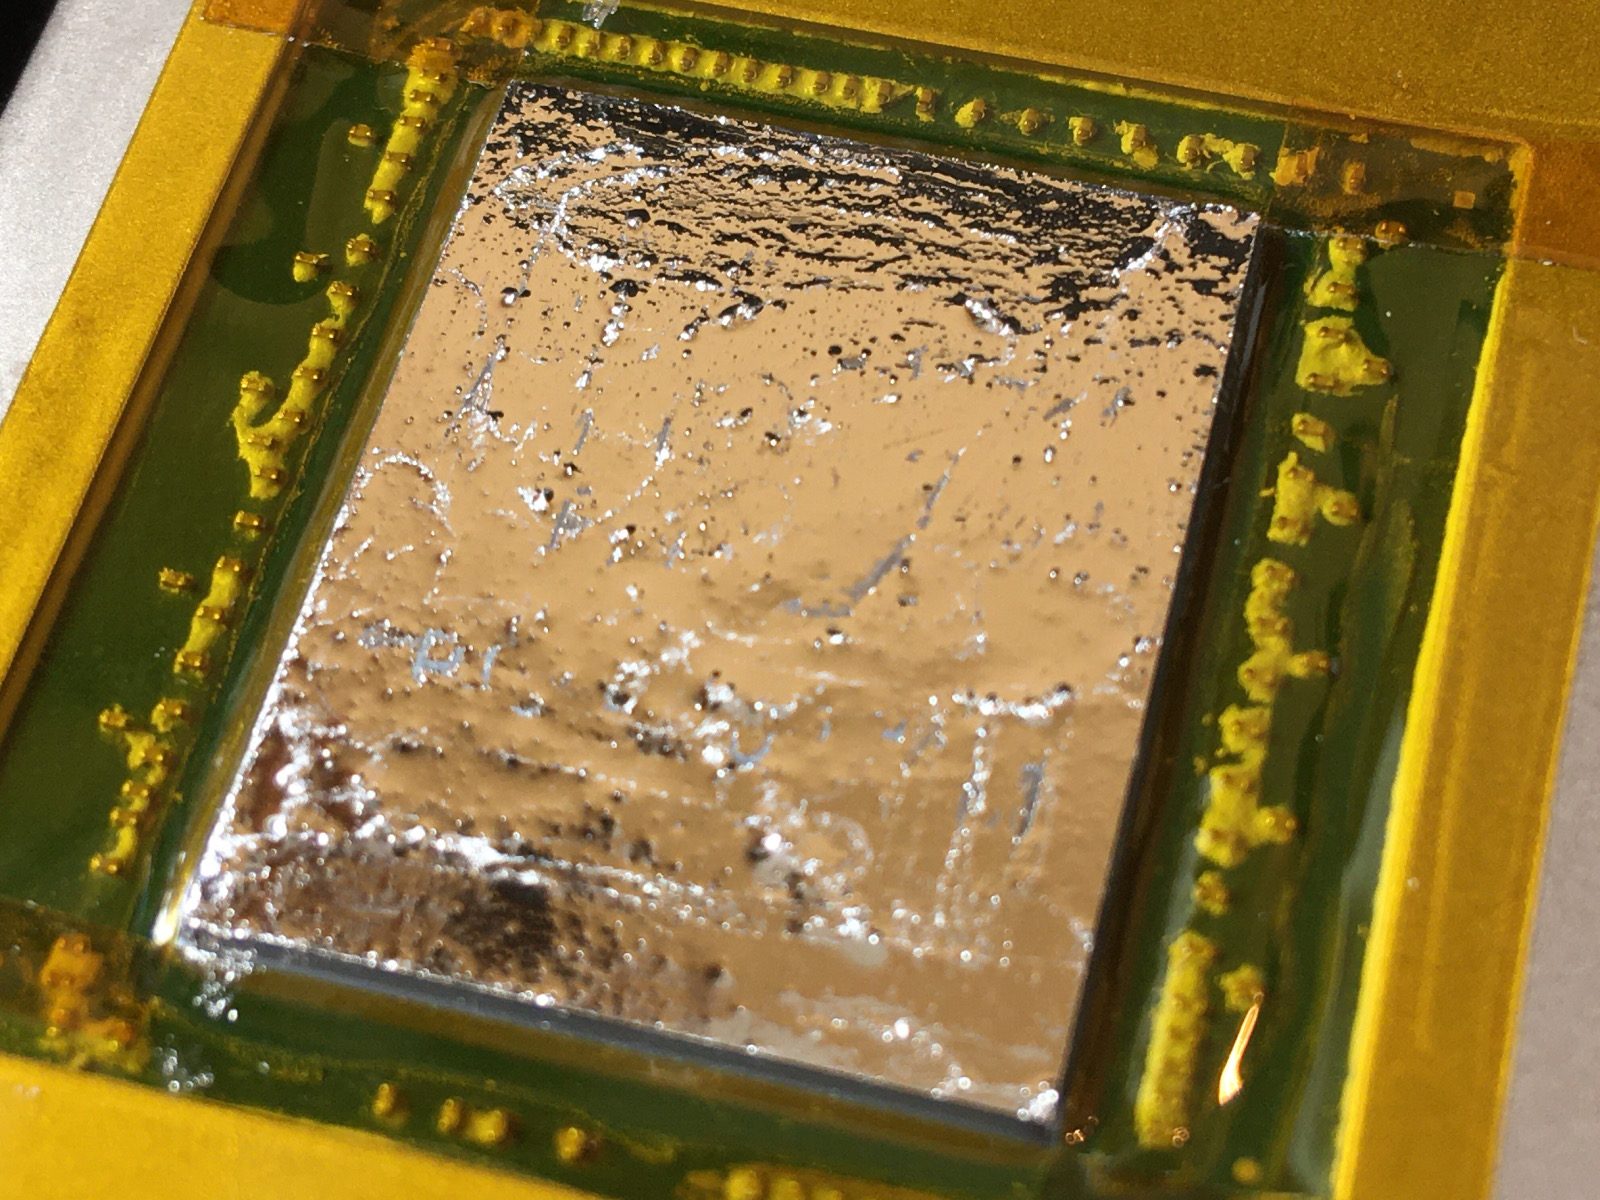
All clean! The die is shiny enough that you can see my thumb taking the picture in it. There’s some paper towel lint still on it, but that was removed before the replacement TIM was applied.
Now on to the scary part. Removing the liquid metal on the CPU die itself was pretty straightforward; there’s some staining of the die itself, but most of that went away after a soak in isopropyl and some light scrubbing. The droplets between the die and the silicone were more difficult. Trying to soak it up with paper towels didn’t work, and trying to wipe it away or scoop it out started tearing the silicone barrier, which covers up SMD components around the CPU die. Instead, I was able to push it all together with the corner of a paper towel, and pull it out piece by piece using a pair of cotton q-tips.
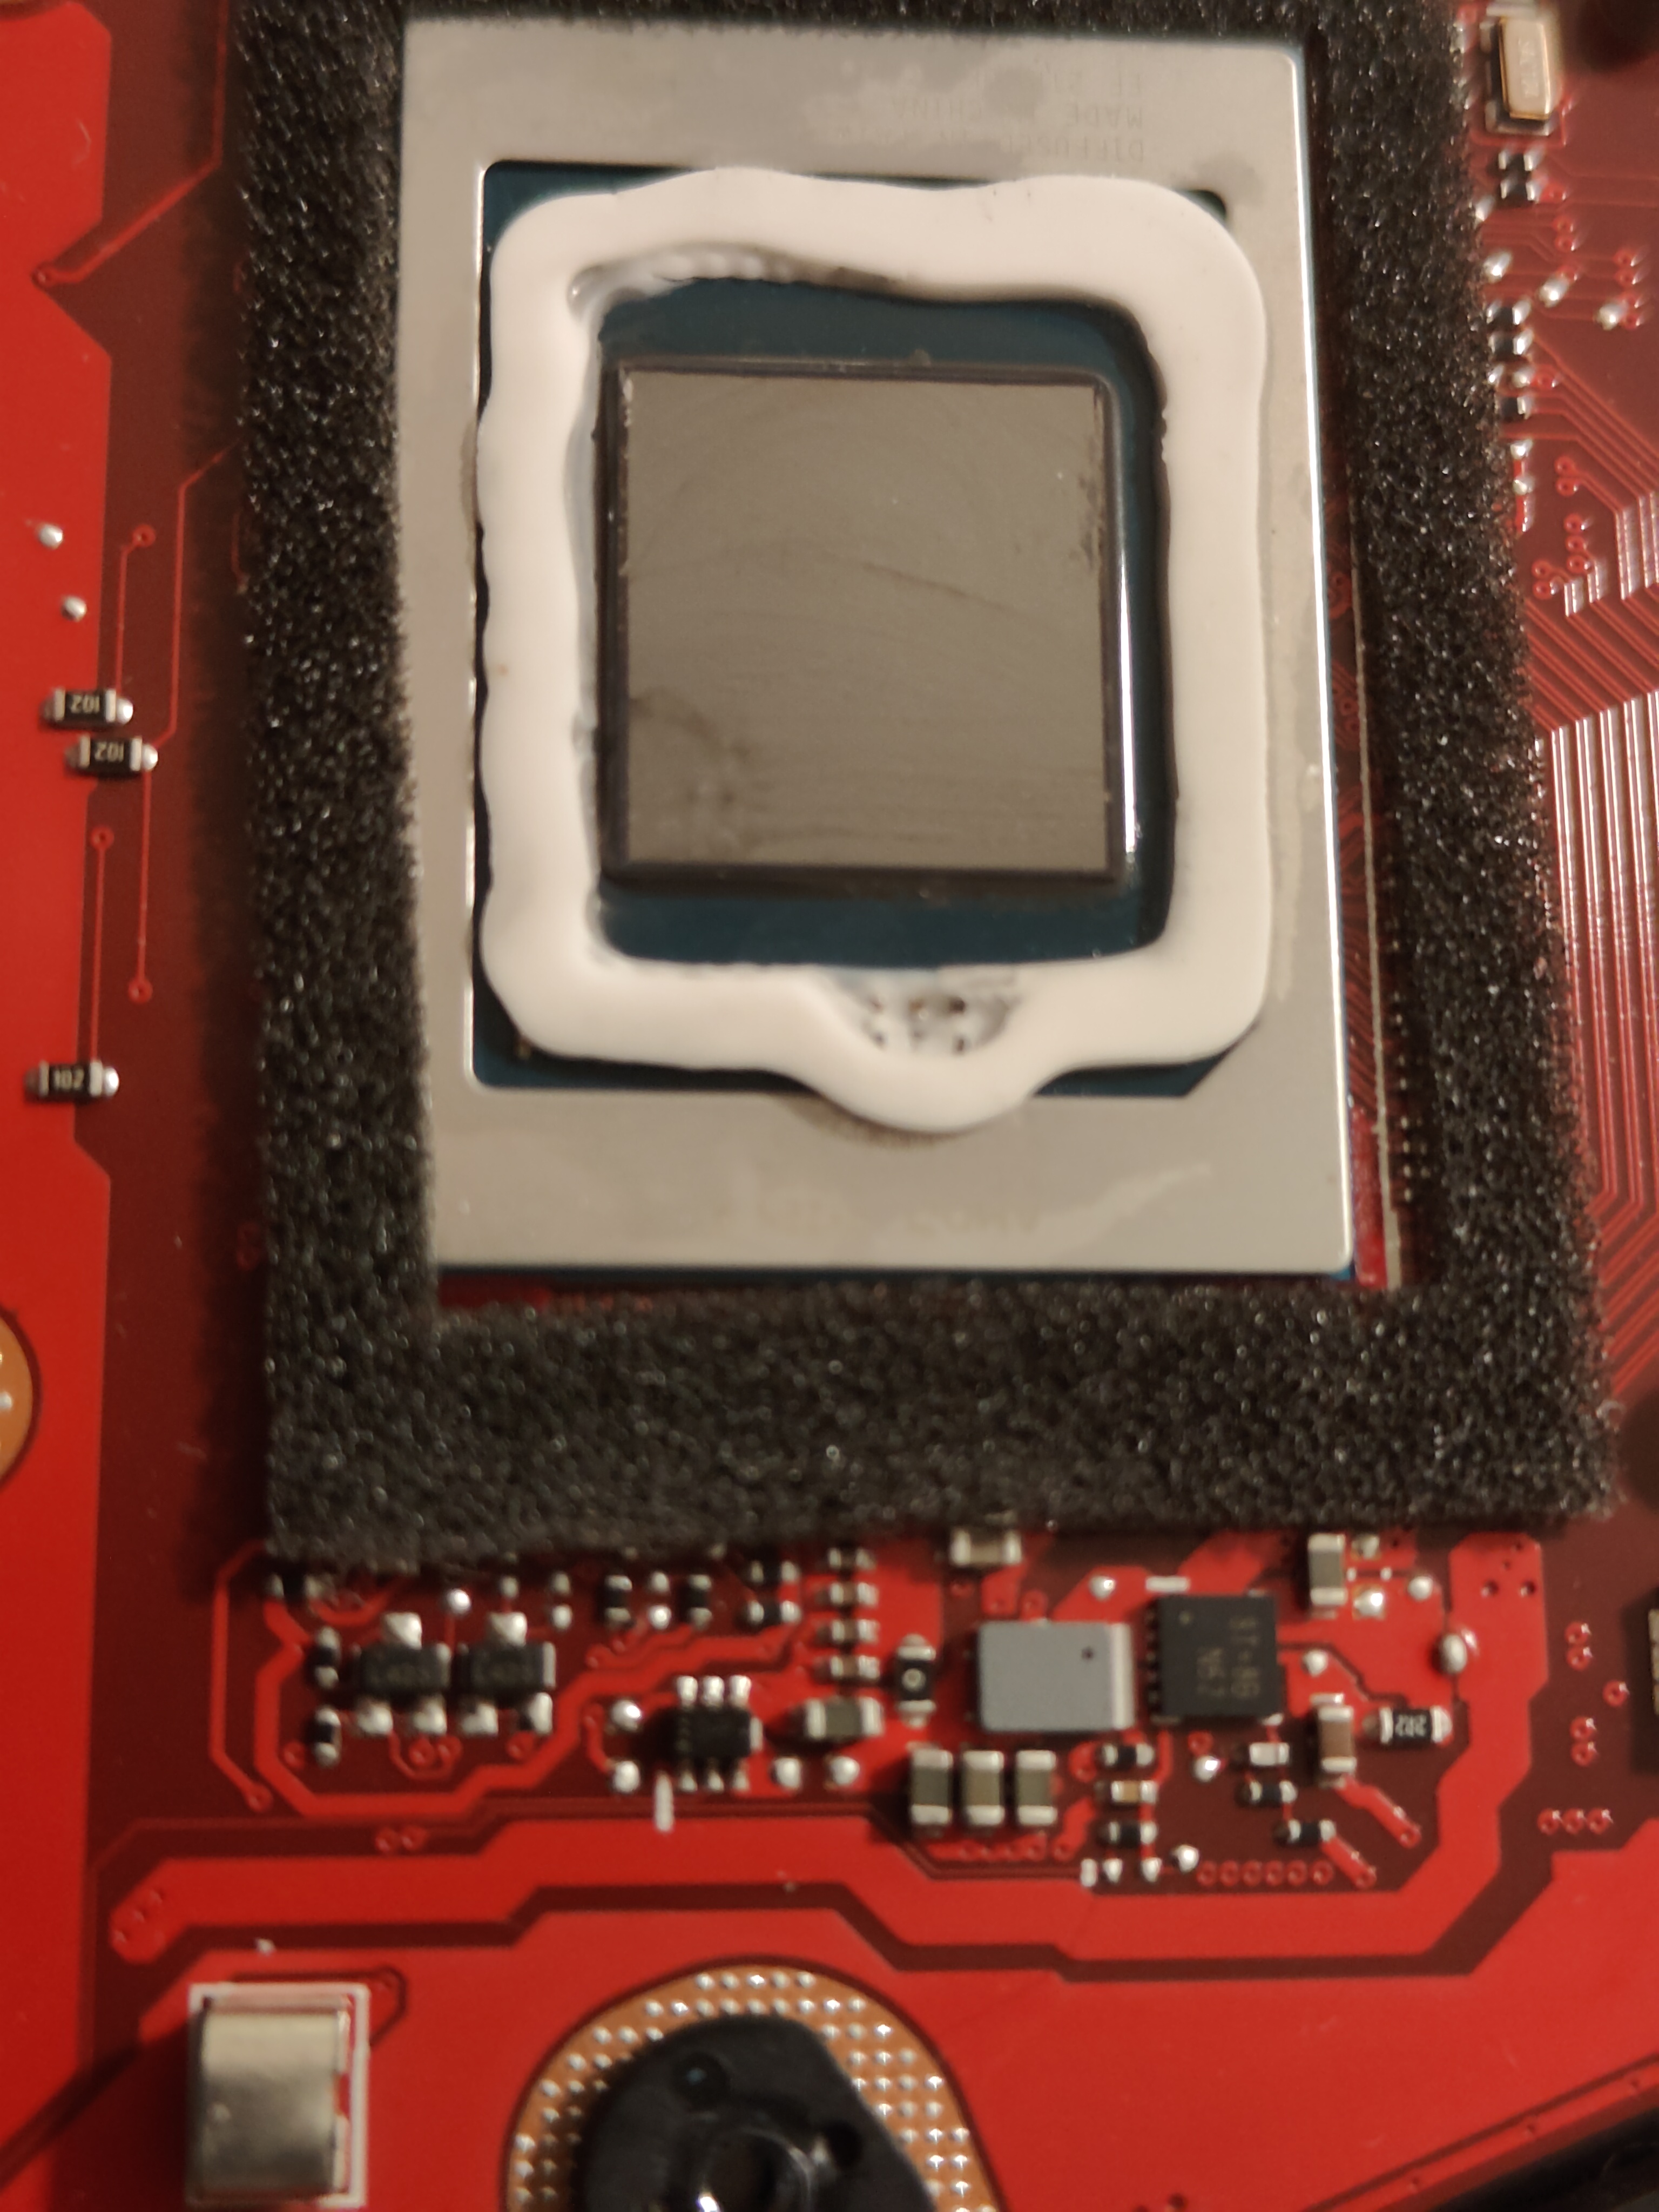
All done. The majority of the staining came off, and almost all of the liquid metal was removed. There’s a small amount left in the top left corner of the silicone barrier, but that’s not going anywhere, especially once the PTM7950 is applied.
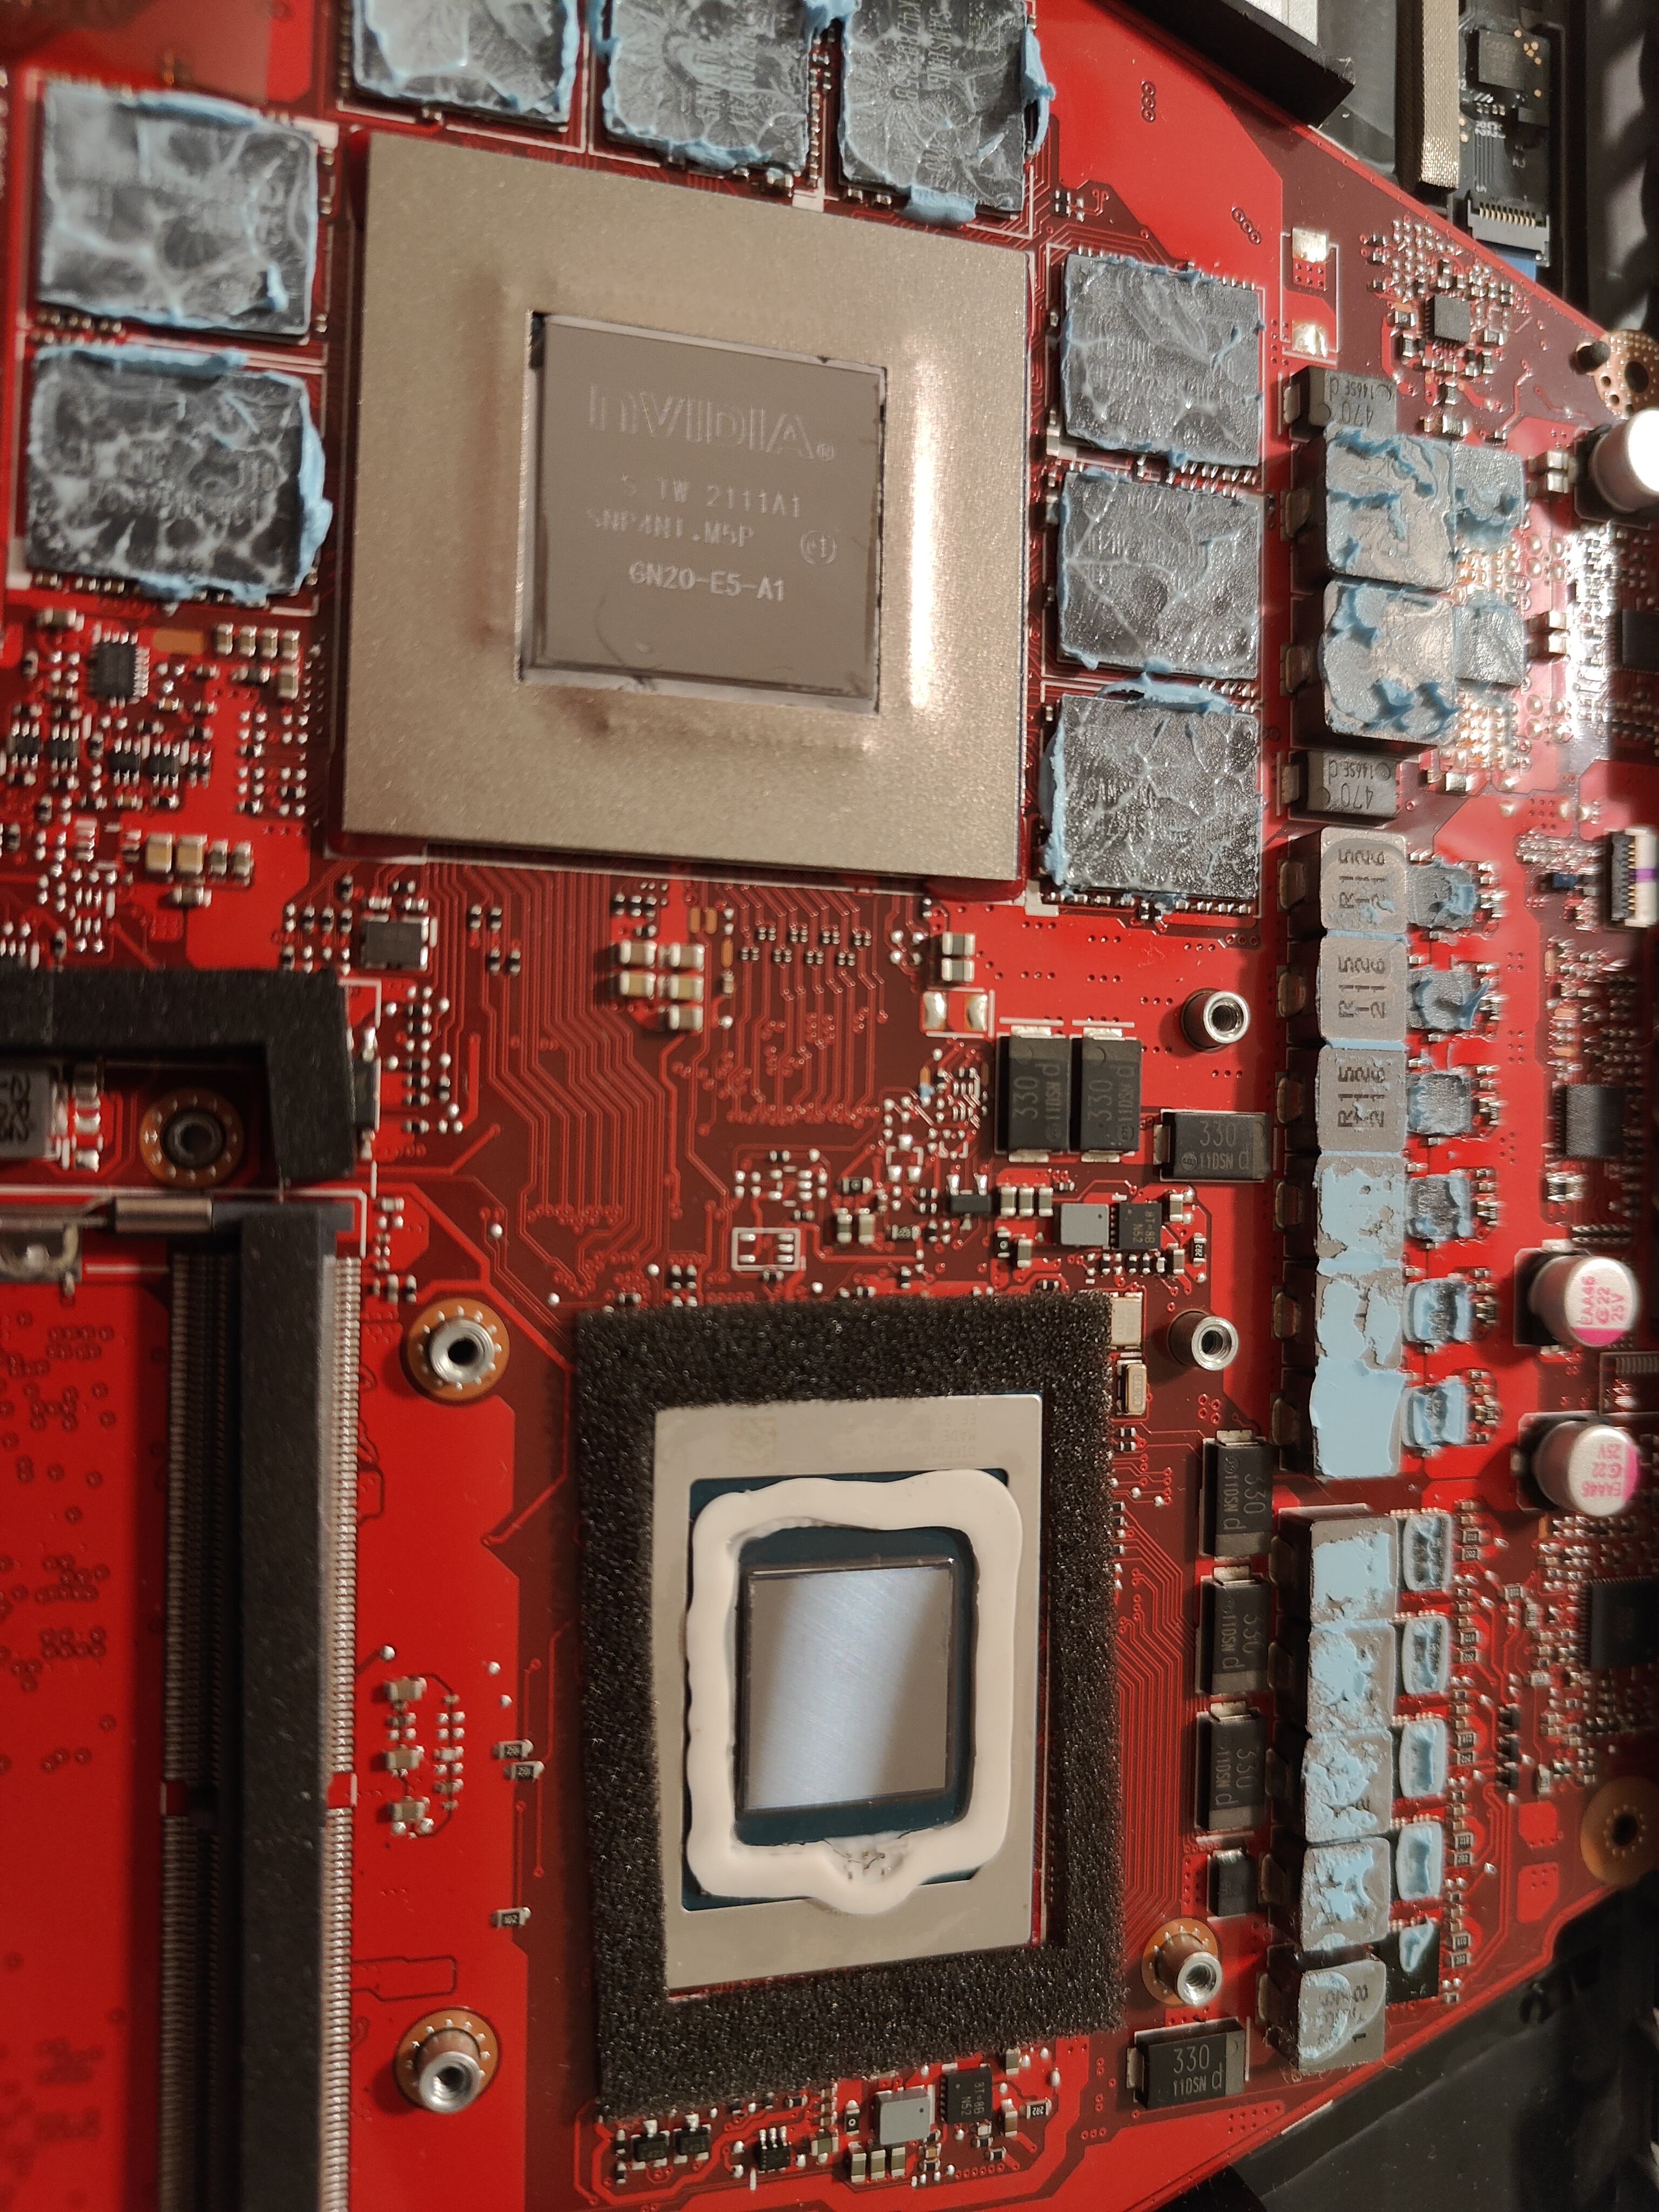
Final state before the new TIM is applied. There’s something very satisfying about the look and shine of bare silicon dies.
To apply the PTM7950, the top and bottom plastic cover need to be removed. I found it easier to place the whole sheet in the freezer and cut it to size with scissors once it was cold. The CPU application isn’t 100% perfect and tore a little in one corner, but the die is still fully covered.
Time to re-seat the heatsink carefully - it must be placed straight down to avoid tearing and shifting the PTM7950. Re-screw the heatsink in the order marked next to the screws, re-attach the wireless antennae, reconnect the battery, and we’re ready to boot up the laptop and check if everything is working properly.
After putting the cover back on and doing some benchmarks, the CPU was no longer throttling (in fact, I never saw it go above 87C, where before 90+C was common), and the GPU was ~5C cooler than with the factory paste. Significant temperature improvement, and my laptop is now slightly less likely to fry itself when I put it in my backpack. Success!
2025-12-19 update:#
It turns out that this article was posted to HackerNews shortly after the original upload. I completely missed it, but better late than never.